
Peacebloom VS Ghouls is a
World of Warcraft mini-game based on the popular Popcap Games title
Plants VS Zombies. A mob of cerebellum-craving zombies is about to invade your lawn, and your only defense is an arsenal of zombie-killing plants. Use spitters, rock-nuts, pumpkin bombs and more to eradicate zombies before they reach your front door and eat your brains!
The goal of the mini-game is to prevent the Zombie invaders from reaching your house, where they will come in and eat your brains. To prevent this from happening you need to strategically place several types of plants on the playing field where they can attack, slow down and block the incoming waves of Zombies.

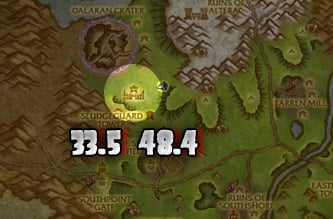
The mini-game takes place at The Brazie Farmstead in Hillsbrad Foothills, just slightly south-east of Dalaran Crater. (Map co-ordinates 33.5 48.4)


Once you reach Brazie’s Farmstead, you will find Brazie the Botanist standing outside of his house, surrounded by his plants. Speak to Brazie and accept his quest to begin the mini-game. (note: once you have completed the quest line, you can no longer play the mini-game. There was a way to continue playing beyond the questline, but that method was removed before the expansion was released. No ETA on when it will be enabled again. )


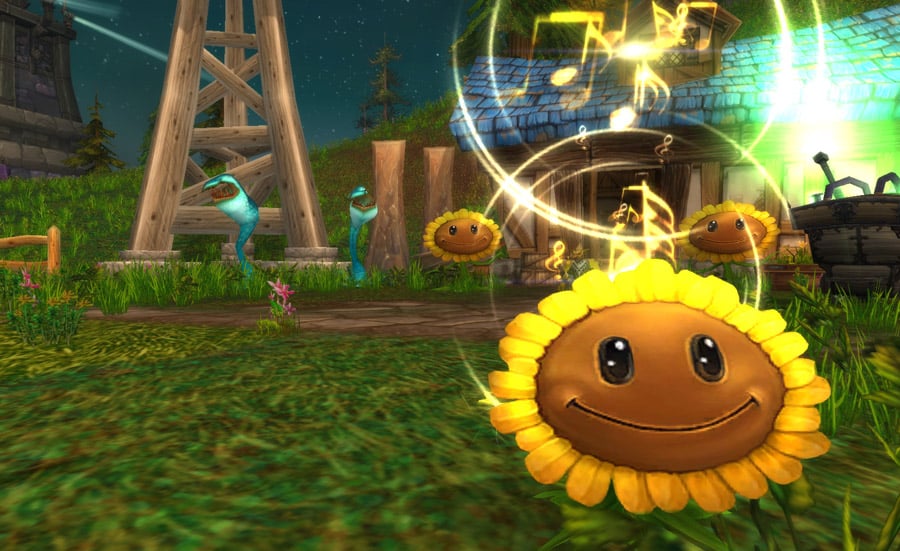
Aside from the gold, experience and fun you get from playing this mini-game comes the coveted Singing Sunflower non-combat pet.
(In addition, you also get to choose between Brazie’s Plant Light and Botanist’s Britches. Both of these reward items are targeted at characters in the level 20 range.) The pet is modeled off the sunflower that appears in the original Plants vs Zombies game. Every once in a while your pet will start singing a line from the
PvZ theme song and musical notes will appear above it’s head.

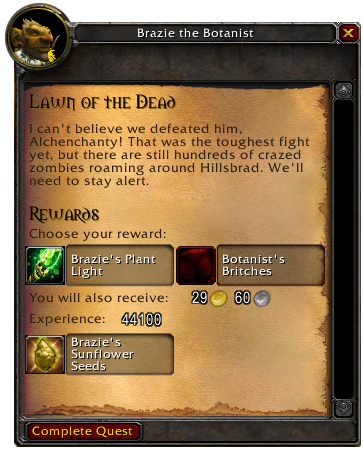
When you complete the final quest in the series, you will be rewarded with Brazie’s Sunflower Seeds.

The seeds grant you the non-combat pet
Brazie’s Sunflower.


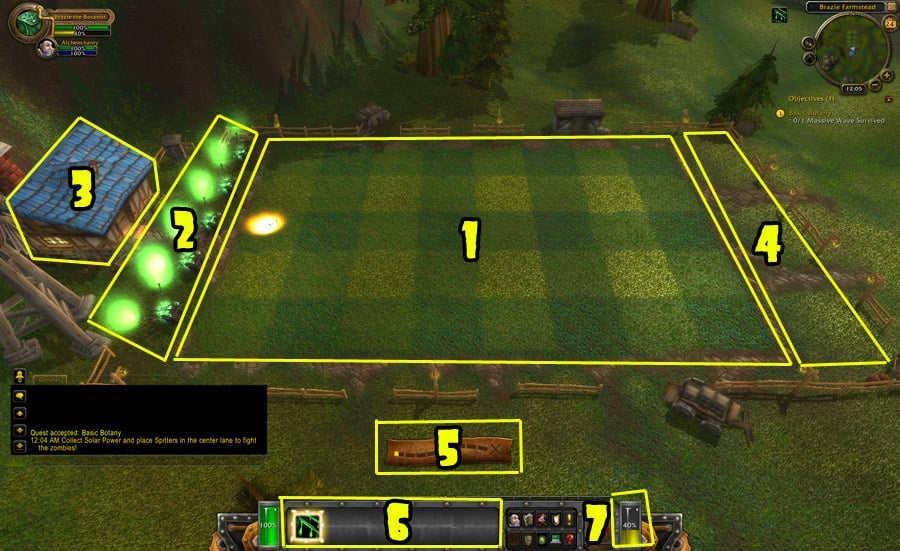

1 –
The Playing Field – a 5x8 grid consisting of 5 lanes with 8 squares each. This is where all of the action takes place.
2 – Your last line of defense, a column of
Fertilize-o-tron 2000s. If an enemy reaches one of these units the
Fertilize-o-tron will mow down the attacker and continue driving off the Playing Field killing every enemy in that lane. However, this will leave a vulnerability in your defenses.
3 –
Your House. Defend it at all costs! If an enemy reaches a vulnerable spot in your defenses, he will continue past it, enter your house and eat your brains! If this happens, you fail the quest and the game ends.

4 –
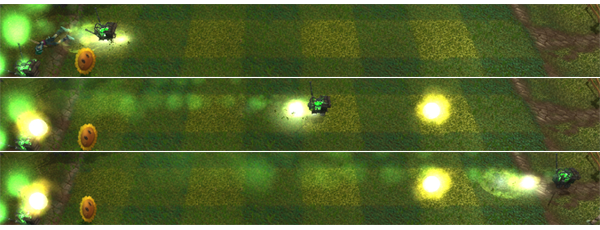
The Ghoul spawning grounds. All your enemies will spawn here on one of the 5 rows, and proceed towards your house. They will always follow a straight line, so if an enemy Ghoul spawns on lane 1, he will stay on lane 1 until he makes it to the other side or is defeated.
5 –
The Progress Meter – As you defeat waves of Zombies, the Progress Meter will fill up. Once it reaches full, and the X is glowing yellow, you will have completed the stage.

6 –
The Plant/Ability bar. You start with one plant, the Spitter. As you progress through the stages, you will gain more plants and abilities up to a total of 6. Each plant and ability has a Solar Power cost to use. The costs are detailed in the next section.

The icons are: 1–
Sunflower 2-
Spitter 3–
Freezya 4–
Rocknut 5-
Strangler Vine 6–
Pumpkin Bomb
7 –
The Solar Power tank. This will fill up in 5% increments every time you collect a Solar Power globe (SP) from the Playing Field.


You play the game with 6 different plants & abilities. When you begin the first quest you will only have the Spitter available, but as you progress through the stages you will unlock the others. Each plant costs a certain amount of Solar Power to use so plan carefully.
1 -
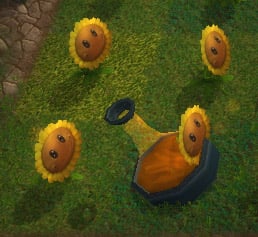
Sunflower - 484hp – Cost: 10 SP - Each of these units will produce one extra Solar Power globe per cycle.

2 -
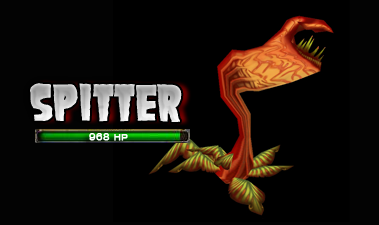
Spitter - 968hp – Cost: 20 SP – This unit will spit a poison attack causing 50 damage to enemies in the line of fire.
3 -
Freezya - 968hp – Cost: 20 SP – This unit does less damage than the Spitter, only 35 per attack, but its attacks will temporarily slow down the enemies it hits.

4 -
Rock Nut – 2420hp – Cost: 15 SP – This unit is used as a barrier. When you place it on a square, no enemies will be able to bypass that square it until they destroy it.

5 -
Strangler Vine - 1936hp – Cost: 30 SP - This unit will grab the nearest enemy, trapping it in the air and slowly damaging it until dead. They cannot trap Abominations or Warden Stillwater but they still deliver damage to those enemies when on an adjacent square.

6 -
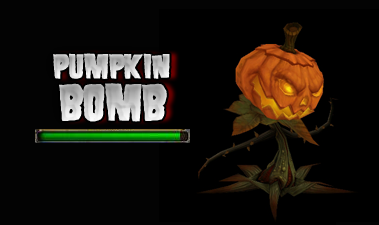
Pumpkin Bomb – Cost: 40 SP - This unit will explode, doing massive damage to any enemy on squares adjacent to where you place it. It is the most efficient weapon to use against Warden Stillwater.

There are 5 types of enemy units and one boss.
1 -
Zombie - 484hp – This is the most common enemy. They move slowly and die quickly.

2 -
Ghoul - 968hp – Ghouls move quicker and do more damage than Zombies. Use a Freezya plant to slow them down, or a Rocknut to stop them while the Spitters take them down.

3 -
Aberration - 3388hp – The most dangerous common unit, it can destroy your plants very quickly. Recommend using a vine to trap it or a pumpkin bomb to defeat it quickly.

4 -
Abomination - 7260hp – They are very slow, but have a lot of health and hit very hard. Strangler Vines will not trap them, so you need to set up Rocknuts to slow them down and use Pumpkin Bombs to take them out.

5 -
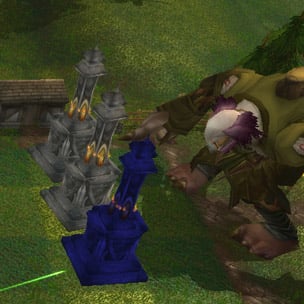
Obelisk - 2420hp - These units block your Spitter attacks from reaching Warden Stillwater. The only effective method of getting rid of them is to use a Strangler Vine.

6 -
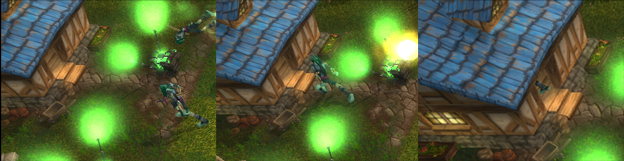
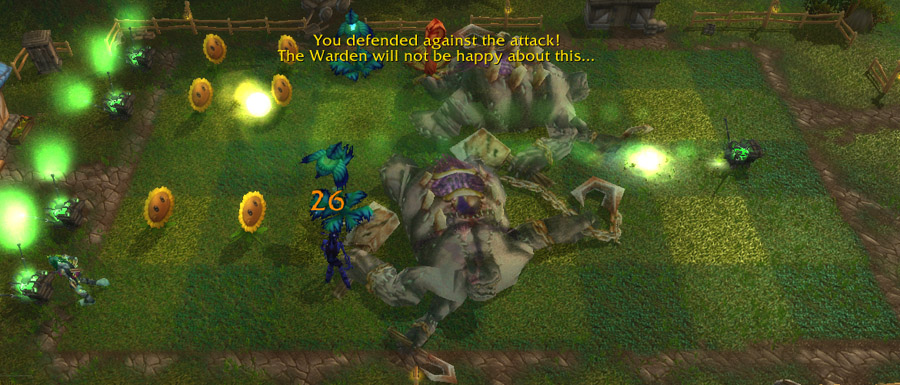
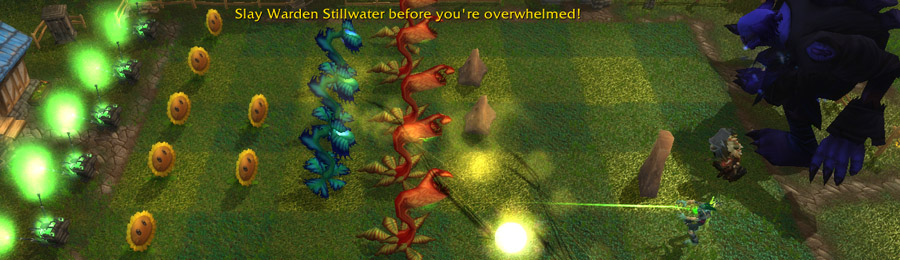
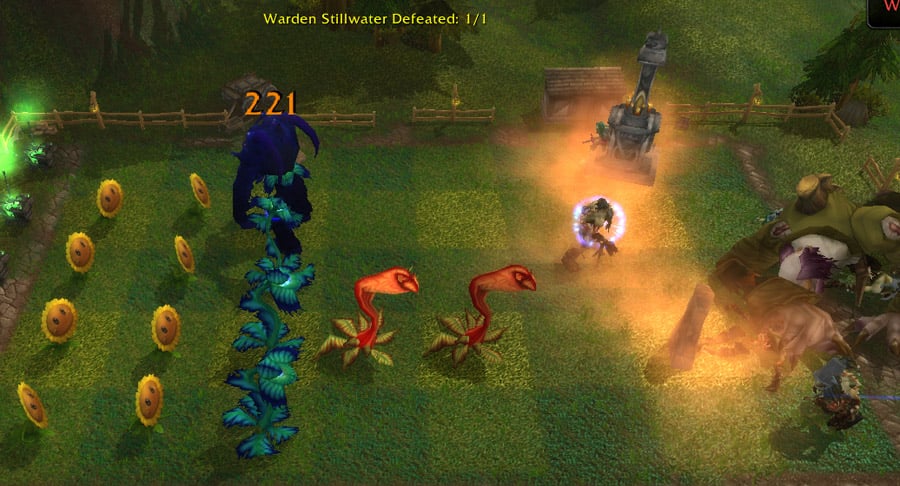
Warden Stillwater - 35000hp – The final boss. He will not attempt to cross the playing field; instead he paces back and forth on the Ghoul Spawning ground, periodically tossing vials of fertilizer onto your plants, which will kill them after 30 seconds. He will also build his own defenses in the form of floating Obelisks. Pumpkin Bombs are the most effective attack against him.


There are 5 quests to complete:
1.
Basic Botany – Survive a Massive Wave of Zombies.
2.
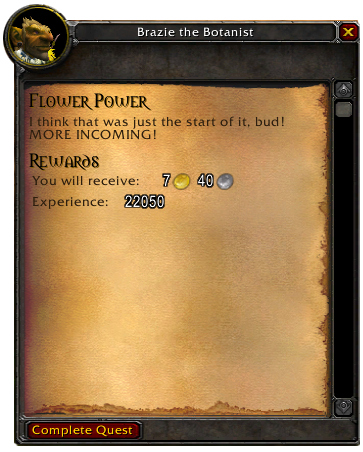
Flower Power – Survive a Massive Wave of Zombies.
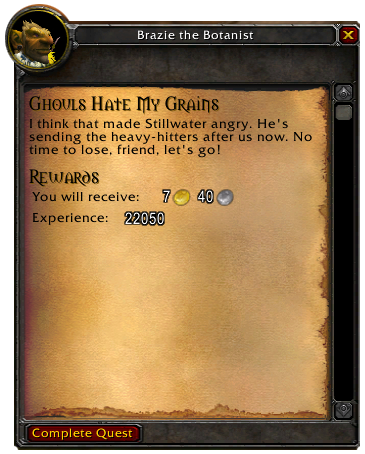
3.
Ghouls Hate My Grains – Survive 2 Massive Waves of Zombies.
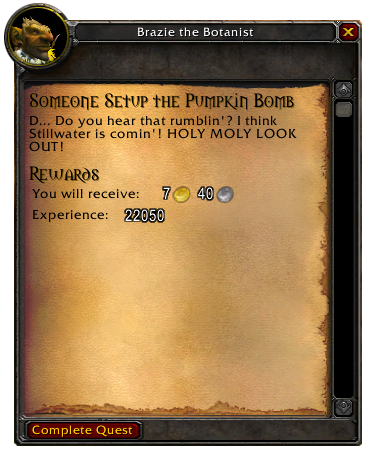
4.
Someone Setup the Pumpkin Bomb – Survive 2 Massive Waves of Zombies.
5.
Lawn of the Dead – Defeat Warden Stillwater

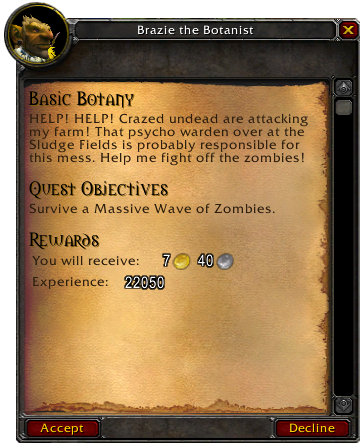
The first quest in the series, Basic Botany is a tutorial. Its purpose is to get you familiar with the playing field and the interface that you’ll be using for the remainder of the quests. Throughout the missions you will get instructions flashing on the screen instructing you on what you need to do to meet the goals required to complete the quest.

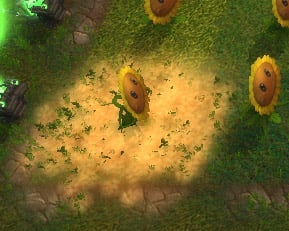
There is no need to rush when this first stage starts, since no ghouls will appear on the playing field until you plant your first Spitter. Take a moment to familiarize yourself with everything on the screen that we covered earlier. Meanwhile, you should be seeing a bunch of glowing golden orbs falling from the sky onto the field. This is your Solar Power (SP).

Right click on those orbs to collect them. You will notice your Solar Power tank filling up in 5% increments as you collect more orbs. Solar Power is the currency you will need to spend on plants and abilities as the game progresses.
When you are ready, click the first icon in your ability bar, the Spitter, and place it in 3A. (that square will be highlighted with a golden circle).
Once you plant your Spitter, you will hear the familiar groan of a Zombie, and then see him appear on the center lane in the Ghoul spawning ground. Your Spitter will start attacking the zombie as it moves towards your house. Even if you only plant that single Spitter, you will still complete this mission, but to speed things along, you can plant several more Spitters in lane 3 to defeat the Zombies quicker. After you defeat a couple Zombies, you will be receive this warning:

This warning indicates the final stage of the battle is about to begin where waves and waves of zombies will relentlessly descend upon you trying to reach your house to eat your brains!
In the tutorial stage however, it just means 5 zombies are going to attack at once. One Spitter can defeat them all before the reach your house, but you likely have 3 to 5 planted by now so the wave should fall rather quickly.
When you complete the mission, you unlock your second ability, the Sunflower.

Speak to
Brazie to complete the quest and prepare for the next stage.


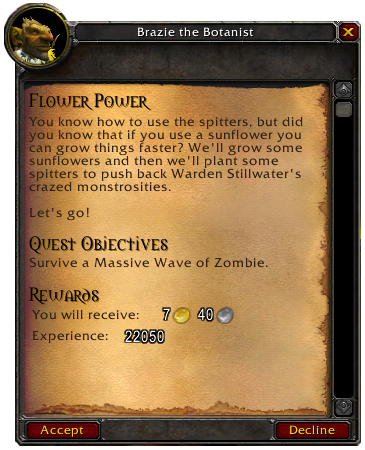
The second mission, Flower Power ramps up the action a little bit. You will be introduced to the second type of enemy, the Ghoul. The enemies will only advance on rows 2, 3 and 4, so you can use rows 1 and 5 to plant Sunflowers without worrying about them being attacked.

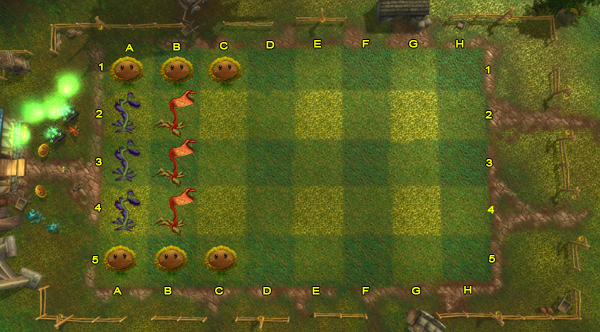
Start collecting the Solar Power from the field and plant Sunflowers on 1A, 1B and 1C. By now a zombie should be on the field. Plant a Spitter in Column B in whatever row the zombie appeared on. Continue planting Sunflowers until 1A, 1B, 1C, 5A, 5B, and 5C all contain a Sunflower, only diverting if a Zombie appears on a row you don’t have a Spitter on yet. You should now have a Spitter on 2b, 3b, and 4b, one for each row that enemies are on.
Around this time a zombie will drop a sack on the field containing Freezya Seeds. Right click this to unlock your third plant, the Freezya.


Start planting a Freezya in 2A, 3A, and 4A.
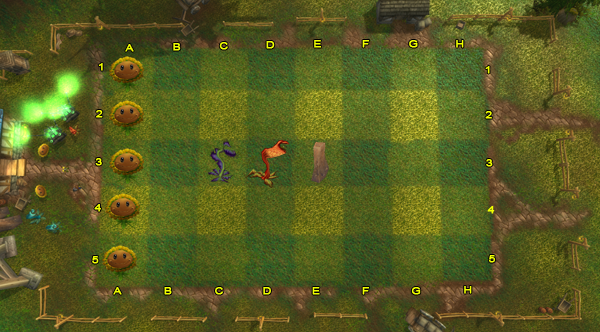
Your grid layout should now match this: Figure.A.01
Now you can continue planting Spitters in rows 2,3 and 4 until the end of the mission. Plant them in the rows that contain the largest amount of enemies first.
When you defeat this mission you will unlock the fourth ability, the Rocknut.

Speak to
Brazie to complete the quest and prepare for the next stage.

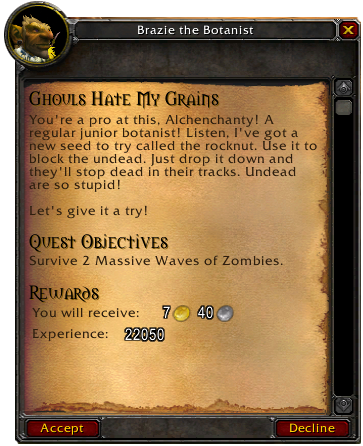
In the third mission, Ghouls Hate My Grains, you have to survive 2 massive waves of zombies. You’ll also be learning how to use the Rocknut and later in the stage, the Strangler Vines. The enemies also learned how to attack on all 5 lanes!

When the mission starts it will highlight square 3E and the Rocknut in your ability bar, but we will ignore that for now, and with your first 10 SP place a Sunflower on 1A, and with the next 10 SP place a second Sunflower on 3A. By now a Ghoul should be coming onto the field on row 3. Now you should place that Rocknut on 3E once you have 15 SP. With your next 10 SP place a third Sunflower on 5A. Then place a Spitter on 3D to take out the Ghoul. If everything was timed right the Ghoul should die before the Rocknut is destroyed.
Your next 3 moves, you should plant Sunflowers in 2A, 4A then a Freezya into 3C.
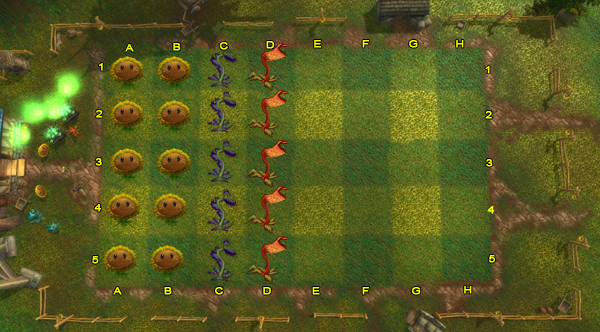
At this point, your grid should match this: Figure.B.01
Your next goal will be to fill column B with Sunflowers, column C with Freezya and column D with Spitters. If you are making good time, you should be able to plant 2 Sunflowers before the next Zombie starts coming. Plant a Spitter on the row the zombie appears on. Another zombie should be coming out now as well, so plant your next Spitter on the row he appears on. There should be a Ghoul coming now as well, and to delay him you’ll want to drop a Rocknut on his square while you save up some SP. Soon as you have 20 Sp drop a Spitter on the Ghouls lane.
While that is being taken care of, plant your next Sunflower, then plant a Freezya on the lane where the Ghoul is destroying the Rocknut. Next plant your final Spitter on row D. Now with all 5 rows attacking, you can plant the remaining Sunflowers and Freezyas. The first Massive Wave should be about to happen, with any spare time you have before it starts you should be dropping some Rocknuts on column G.
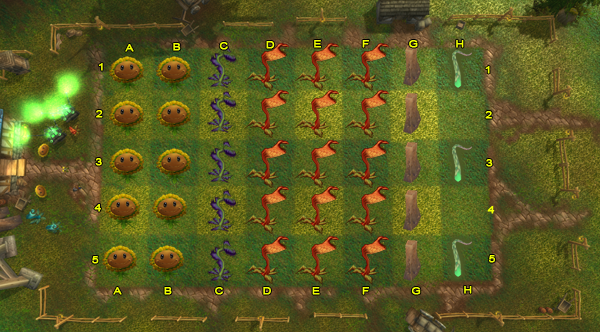
Your grid should look like this (possible with some Rocknuts in column G) before the first massive wave comes: Figure.B.02
Your next goal at this point will be to fill column G with Rocknuts. Around the time you fill up that column, the first wave will be dead and a Ghoul will drop a bag on the field. Click the bag to unlock your 5th plant, The Strangler Vines.

The next stretch before the final wave is mainly about placing plants where you need them. If any of your Rocknuts get destroyed, rebuild them in the same spot. The rest of your SP should be spent filling rows E then F with Spitters, alternating with dropping Strangler Vines into row H.
Once the second and final Massive Wave starts you should have all of column G filled with Rocknuts, one to three Vines up in column H and columns E and F nearly full of Spitters.
Your grid moving into the final wave should be nearly full and look something like this: Figure.B.03
When the final Massive Wave starts you will be introduced to the third enemy unit, the Abberation. If he appears in a lane where you do not have a Vine already planted, that should become your priority. All of your SP at this point will be spent dropping Rocknuts to replace destroyed one, and dropping Vines to replace defeated ones.
Once you defeat all the Ghouls, and complete the stage, you will unlock the final plant in your arsenal, the Pumpkin Bomb.

Speak to
Brazie to complete the quest and prepare for the next stage.

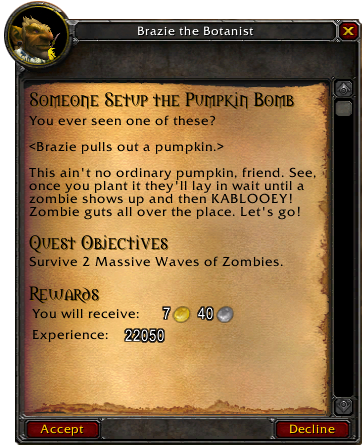
The penultimate quest, Someone Setup the Pumpkin Bomb, is arguably the most difficult of the series. You will need to play the field reactively since you won’t have a lot of time to plan things out due to the volume and randomness of the invaders.

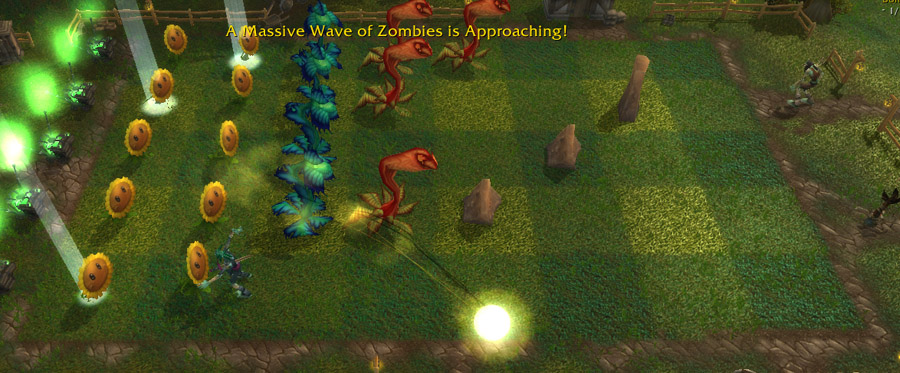
What you should aim for is a layout similar to Figure.B.02 for the base of your defense. You will be need to use a lot of Rocknuts on the right side of the field as you build up your left side defenses. Any time you see a Ghoul coming from the spawning ground, drop a Rocknut on column G or on F if the Ghoul has already made it to that square before you had enough SP.
If you don’t have at least the same defense built up as Figure.B.02 by the time the first Massive Wave arrives, you will probably fail the quest so it’s better to reset and try again at that point or you may just be prolonging the inevitable loss of brains.
Figue.B.02 (you should have this layout plus a scattering of Rocknuts in different stages of destruction on the right side of the field)
During the first wave you will be assaulted by Zombies, Ghouls and Aberrations on all lanes so you’ll be using a combination of Rocknuts, Vines and Pumpkin Bombs to survive. Drop a Spitter into column E whenever the Pumpkin Bombs and Vines are on cooldown until column E is full.
You will not be able to prevent plant loss in this stage, so don’t get too worried if you start losing some of your front line. If there are too many enemies building up, make sure to drop a Pumpkin Bomb in the middle of the cluster. Losing a full row during the first Massive Wave is not unusual for this stage. Just try to refill those squares in the base defensive line as quick as possible. If you see an Aberration by itself, it’s a good idea to drop a Vine on him, but if he is surrounded by 2 or 3 other friends, save the SP for the Pumpkin Bomb and take out the cluster.
Moving into the second wave, your defensive line will probably be a mess, just make sure you still have the full 2 columns of Sunflowers, and focus your SP on Rocknuts and Pumpkin Bombs.
This second and final wave of this stage will introduce the Abominations. You will get 3 of them in the initial rush. They are immune to vines so you need to Rocknut the lane they are in then save up SP for Pumpkin Bombs. It’s going to take 2 or 3 hits with the bombs to take them down. Try to place the bombs on squares that will hit as many adjacent enemies as possible. An Aberration or Ghoul may already have broken an entire row, but if there is a Fertilize-o-Tron in that row, don’t waste any SP trying to kill it. Stay focuses on taking down the Abominations. The Fertilize-o-tron will take down the enemy and everything else in his lane when he reaches it so it might actually help you. However, if there is no defense remaining in that row, then you need to drop a Vine on them as soon as you have enough SP to keep them from reaching your house.
With a little luck and timing, you should complete this mission by the skin of your teeth.
Speak to
Brazie to complete the quest and prepare for the final stage.

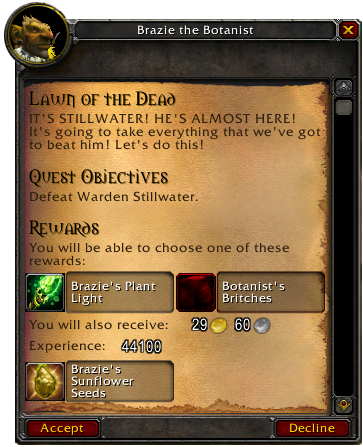
The final quest in the series,
Lawn of the Dead, puts you and your plants up against the main villain,
Warden Stillwater. This stage is very similar to the previous one in that it is mostly a reactive fight, and does not leave you a lot of time to build a strong defense before you are attacked. Also new to this stage, neither your plants nor the enemies adhere to one lane of attack anymore. Often you will find your
Spitters shooting across lanes, or notice a
Ghoul walking across a lane or two to attack something.
You will notice there is no
Progress Meter when this stage starts. When
Warden Stillwater arrives, his health meter will appear in the space where the Progress meter would normally appear.
Your main goal before he arrives is to form at least one column of
Sunflowers and one column of
Spitters. You will need to make strategic use of
Rocknuts to buy some time to finish both of these columns if you are going to make it in time.
Your layout when the Warden arrives should be at the very minimum like this (with some Rocknuts in various states of decay on the right side of the field): Figure.C.01
About the time you achieve that layout, the Warden will spawn and yell
“Enough fooling around. It’s time for some hands-on management!”. You will then receive this warning:
Your goal now is too fill column B with
Sunflowers and column C with
Freezyas. As in the previous stage you will need to be switching between dropping a lot of
Rocknuts and
Strangler Vines on the left side of the field to delay the clusters while you build out the defensive line. Once those left side columns are full the fight becomes a lot like the final wave of the previous fight mixed with a lot of maintenance.
You will need extra maintenance because periodically during the fight,
Stillwater will shout
“Enough of your pesky pea-shooters. Let them shoot at this!” and toss several vials of
Fertilizer onto your plants. After 20-30 seconds, the plant will die and you will need to replace it as soon as you have enough SP.
Each time this happens, a green globe of fertilizer will drop somewhere on the field. Collecting the globe grants you a buff that increases the drop cycle of the
Solar Power by 100% for 15 seconds. This boost is a good time to drop a
Strangler Vine and
Pumpkin Bomb on large clusters then repair holes in your defenses.
Additionally, he will spawn 2 or 3
Obelisks on row G to protect him from incoming attacks. You need to plant
Strangler Vines next to them in row F to clear them out of the way.
The rest of the fight you will rotate between dropping
Pumpkin Bombs on
Stillwater, repairing holes in your defensive line and dropping
Rocknuts to slow down the clusters.
If you survive long enough to defeat him, the Warden will yell
“What? No?! This lawn… was… mine…” and you will have completed the entire series of quests.
Speak to
Brazie to complete the quest and claim your reward!

 M+ Dreaming Hero Title -- Updated April 16
 M+ Dreaming Hero Title -- Updated 16 April
 May be stop wasting resoures on experiments?
 More permitted video sources
 [iStableMaster] New hunter addon
 MMO-Champion


 Recent Blue Posts
 Recent Forum Posts


 Originally Posted by Agoonga


 Reply With Quote


