Limited PvP -> PvE Free Character Transfers
 Mythic+ Dungeon Adjustments - 27 April
 Seasonal Poll: What Playable Race would u like to have in World Soul saga?
 MMO-Champion


So I thought it be nice to get you guys to be a little creative in this topic. To make this a little extra fun I'm making a small leaderboard for the super creative (I'll be the judge, I can't be online reading submissions all day so bear with me). The more participants the more fun it can be. Oh and yes you can enter more than once just don't spam (see leaderboard rules). Don't feel bad if you don't make the leaderboard or are knocked off, hopefully it will make you try again. It's not that your idea sucked, it's all about fun and expressing your creativity using the WoW universe.
Some helpful websites: (Useful for your boss/raid ideas)
http://www.wowwiki.com/Portal:Main
http://www.wowwiki.com/Major_characters
http://www.wowpedia.org/Portal:Main
(If people know of other good sites please let me know and them I'll add here)
OBJECTIVE: The idea is a 5-6 (minimum 5) boss encounter raid. You must fill in the details and be creative. You don't need to fill in their list of abilities if you don't wish to, however, you can give outlines of some abilities or go full out, but ultimately it's up to you. All bosses are assumed to be at max level (so don't worry if you're choosing Hogger). Format is below.
Note: You can make this as basic or advanced as you like, from a quick brainstorm idea of 5 min to a much longer train of thought. However, the most creative will most likely be on the Leaderboard.
GENERAL RULES:
- You must pick a location somewhere within the existing WoW world (this includes Pandaria).
- You must choose bosses that already exist in game (you may include NPCs) you may change the name and abilities but you cannot make up your own races etc. As long as it's within the WoW universe you are fine (ask if you are unsure) . These characters can be from any region, dungeon, raid or faction leaders etc in-game. The name is the only needed of the boss; if you think people can't remember what boss it is maybe try write a location or some flavor text or some lore. ie. Kael'thas (Tempest Keep).
- You may make your own flavor text beside each option or under each boss. Such as Designer Notes splitting up your raid with basics on what's going on, a boss could be optional to fight and not needed to die in order to fight the final boss (mention this). You can even title your boss ie. Kael'thas <Pony Killer>. All this is optional! Make your raid as serious or hilarious as you want, it is your raid! +points for creativity
- You may add an additional optional boss (7th boss limit) to your raid instance like some sort of unlock only boss (ie. Algalon in Ulduar).
- Make your raid idea presentable.
-EXTREMELY IMPORTANT: When you are finished your raid, make an indication that it is finished and that you are not updating it further, once this is done it will be considered for the leaderboard.
If there is any indication that you copied someone elses work within this thread your idea will be rejected. There is no harm getting an idea from someones work, but no do not copy it and change minor things.
LEADERBOARD RULES:
- If making another raid idea it can only submitted once every 24 hours or it's dis-qualified from being put into the leaderboard.
- You can be on the leaderboard more than once.
- You don't need to finish your idea in one go, but it must have a minimum of 5 bosses (max 7 with optional boss) before it is considered for the leaderboard.
Format:
The Raid Name:
Location:
Area/Lore/Objective Text: (This text can be used throughout the format see my brief example)
Boss 1:
Boss 2:
Boss 3:
Boss 4:
Boss 5:
Boss 6:
Optional Unlocked Boss: (Delete if not appropriate)
Basic (and very brief) Example
Note some of my bosses are not NPCs/bosses in WoW (hi dreadlords!), this is just a very quick example.
The Raid Name: Pinnacle of Ponies
Location: Coldarra - Surrounding the Nexus
The Burning Legion has infiltrated Coldarra because their love for ponies, the Grand Master Pony resides at the top of the Nexus, because their love is so strong they end up capturing the ponies. The Dreadlords and Eredar within the surrounding regions of the Nexus have sworn an oath to protect all ponies.
The raid must defeat the first 3 bosses in any order they choose on the ground level before advancing through a portal to the top.
Boss 1: Varimathras <Protector of Ponies>
(Extra Flavor text) Example: The protector of the western section.
Boss 2: Mal'ganis <Necromancer of Ponies>
Boss 3: Tichondrius <Teddy Bear Fan>
On the second tier another two bosses can be fought in any order.
Boss 4: Balnazzar <Grand Slayer>
(Extra Flavor text)
Boss 5: Archimonde <Lover of Ponies>
(Extra Flavor text)
On the grand pinnacle the final boss awaits the raiders.
Boss 6: Arthas <Prince of Ponies>
(Extra Flavor text)
Upon killing the final boss the Grand Master Pony appears and shoots rainbows from his ass and applauds your efforts.
Leaderboard:
1st - Leohkiin - The Sundered Monolith - 6 bosses (New entry on 2nd October)
2nd - Leohkiin - The Depths of Deepholm - 7 bosses (1st on 13th September)
3rd - McNeil - The Unholy Bastion - 6 bosses (Highest position 1st on 18th August)
4th - Leohkiin - The Infernal Stronghold - 6 bosses, 7th Unlockable (High Position 2nd on 26th August)
5th - Chemicader - Corruption of Dalaran - 6 bosses & 1 Optional (New Entry on 14th September)
If you are no longer on the leaderboard, I'll edit your submission with the highest entry it was awarded and how long it stayed on the leaderboard. All times are when I viewed the submission.
Try be creative guysDon't just pick the usual suspects that everyone else may use all the time. Variety is the spice of life! Join in and check back to see if you've been added or replaced on the leaderboard!
 Recent Blue Posts
 Recent Forum Posts
Thread: Creative: Make Your Raid
-
2012-07-22, 01:35 AM #1The Lightbringer

- Join Date
- Apr 2009
- Location
- Cork, Ireland
- Posts
- 3,041
Creative: Make Your Raid
Last edited by Azshira; 2012-10-02 at 06:30 PM.
-
2012-07-22, 03:42 AM #2Warchief


- Join Date
- Sep 2009
- Posts
- 2,102
I'll be joining, but I want to say http://www.wowpedia.org/Portal:Main is a much better site; it is updated more so than wowwiki.
Thanks for the link -Azshira
Last edited by Azshira; 2012-07-22 at 09:17 AM.
-
2012-07-22, 03:51 AM #3The Insane

- Join Date
- May 2011
- Location
- New York
- Posts
- 16,885
Nice idea, I'll be sure to post one later when I get to my laptop.
Just a few questions, is this designed for LFR/Normal/Heroic 10 and 25?
Can you change the raid limit, for example, back to 40?
Also, are all the bosses in the same instance?
As of right now I'd just throw 6 End tier bosses in a pit and say a 50 or 60 man raid has to kill them all simultaneously. Specifically, Lich King, Ragnaros, Illidan, uhhh...Sinestra, and Yogg all on an uninjured from Dragon Soul Spine of Deathwing who also took enough Steroids to get big enough to fit everyone.
Yeah,,,
-
2012-07-22, 03:56 AM #4The Unstoppable Force

- Join Date
- Mar 2011
- Location
- Dota 2 24/7 / Dark Souls II
- Posts
- 21,566
http://www.wowpedia.org/User:Alcatraz
I've made mine but been lazy updating it <.< but it is 9 bosses :P
-
2012-07-22, 06:54 AM #5The Lightbringer

- Join Date
- Jul 2010
- Posts
- 3,853
Highest Position: 1st on the 27th July. Remained on leaderboard: 49 days.
I'll probably update this a few times over a bit of time, probably won't do all of this in one sitting.

Shaffar returns! After Cutting a deal with the Sha for some of their power, and providing them with arcane energy in exchange, Nexus-Prince Shaffar uses his new found power to revitalize his allies, and recruit some new mercenaries, straight out of (Dalaran) prison! While planning on providing said arcane energy on his own time* Shaffar plans to build his own arcane army, overthrow the Consortium, and claim Outland for himself!
Since then, the entirety of Auchindoun has be surrounded by Sha and Arcane magics, the powers combining creating a powerful, almost impassable swirl of magic. Players must fly high above Auchindoun over top the massive storm magic, and directly into the eye...
*Never
Bosses
-Pandemonius (Finished!)
-Tavarok (Finished!)
-Erekem (Violet Hold) (Finished!)
-Yor (Finished!)
-Xevozz (Violet Hold) (Finished!)
-Nexus-Prince Shaffar (Finished!)
Boss: Pandemonius
Being already a Void Lord, Pandemonius openly accepted the new Sha power inside of him, embracing it with all his might. Pandemonius now once again stands guard of the inner Mana-Tombs, prepared to destroy anyone foolish enough to disturb his master's domain.
Abilities
Phase 1 - The Gatekeeper Pandemonius
-Frost Fever: Pandemonius inflicts his current target with a Frost Fever, dealing x damage over time, and reducing movement, attack speed, and casting speed by 20%, this effect stacks up to five times. If Frost Fever Reaches five stacks, the target is affected with Frozen Sickness.
-Frozen Sickness: Players affected by Frozen Sickness are paralyzed with fear and illness, preventing all movement and actions. Frozen Sickness must be dispelled with any sort of dispel ten times (twenty times in 25 man) in order for the player to recover.
-Void Blast: Pandemonius fires a blast of the void at the target, knocking them to the back of the room, and dealing x shadow damage.
-Slow: Reduces the targets movement, casting, and attacking speed by 60%, cast immediately on the target after Void Blast. (Magic Effect)
-Zone of Fear: Following the use of Slow, Pandemonius creates a zone of fear beside him, the player hit with void blast and slow must reach, and stand in the Zone of Fear within 15 seconds, or the zone will explode, dealing x shadow damage to the raid, and fearing all targets for 5 seconds.
When Pandemonius reaches 35%, he transitions into phase 2.
Phase 2 - Old and new allies
-Dark Shell: Upon entering phase 2, Pandemonius places a dark shell on himself, any spell or melee attack done against Pandemonius will be reflected back at the attacker, this shell lasts until the end of phase 2.
-Ethereal Monstrosity: Pandemonius summons a mutated ethereal to attack the players. One Ethereal Monstrosity will be summoned at the beginning of the phase, and three more, once every 40 seconds.
Ethereal Monstrosity
-Dark Swipe: The monstrosity swipes its current target, dealing x shadow damage, and increasing all shadow damage taken by 10% for 30 seconds, stacks.
-Magic Air: The monstrosity summons a cloud of magic air, this cloud travels slowly around the room, dealing x arcane damage to anyone standing in it every second.
-Arcane Supernova: When the monstrosity reaches 1% health, it will latch onto its target, and begin to cast an Arcane Supernova. This Supernova will deal x arcane damage after 7 seconds, to the target, spread among those within 5 yards of the target.
-Being of Fear: Pandemonius summons three Beings of Fear. These Beings cannot be tanked.
Being of Fear
-Focus: The Being of Fear will only focus on targets that are not currently feared.
-Dark Fear: The Being of Fear inflicts an unimaginable fear upon the target, causing them to run in horror for 20 seconds. After 5 seconds, this effect can be dispelled.
-Soul Chill: The Being of Fear chills the targets soul, absorbing the next x amount of healing, and reducing the targets movement, attacking, and casting speed by 10% every second. After 10 seconds, the target is afflicted with Frozen Sickness.
After all Ethereal Monstrosities and Beings of Fear are killed, Pandemonius will enter phase 3. Pandemonius begins to glow black and white, and the eyes of sha creatures begin to grow upon him. Pandemonius has access to all abilities in phase 1.
Phase 3 - A being of Void and Fear
-A being of Void: Pandemonius is empowered by his own void, his attack speed and melee damage are increased by 30%.
-A being of Fear: The power of the Sha surges through Pandemonius' body, causing his attacks to constantly strike fear into his enemies. Every fifth melee attack, the current target is feared for 1 second. Every third tick of frost fever, the player affected by it is feared for 1 second. Every time void blast is cast, a random player (other than the current target) is feared for 3 seconds. Every time slow is cast, and every 2 seconds it lingers on the target, a random player (other than the current target) is feared for 2 seconds. The fear duration of the detonation of Zone of Fear is doubled.
Boss: Tavarok
Tavarok too stayed loyal to Shaffar, accepting his new Sha powers with open arms. These powers now flow through the very stone Tavarok is made of, granting him powerful Sha magic.
Abilities
Phase 1 - The Stone Fear nothing!
-Solidity: As players attack Tavarok, his stone body is slowly chipped away. Tavarok loses 1% solidity for every 1% health missing.
-Sha Infused Stone: For every 5% solidity lost, a small piece of rock is broken off Tavarok, this piece will fly in the direction of a random player, and deal x shadow damage in an area upon landing, and will remain there for the duration of the fight, dealing damage to anyone getting near it.
-Overload Magic: At 90% solidity, and every 45 seconds after that, Tavarok will overload one of his Sha Infused Stones with magic, causing an eye of sha to rise from it, and deal x shadow damage to the raid every 3 seconds. While the eye is alive on the stone, the stone no longer deals damage to those around it, until the eye is killed. Every time Overload Magic is cast, the next cast of Overload Magic will spawn an extra eye. If there are more eyes than Sha Infused Stones, a Sha Infused stone will instead be re-abosorbed by Tavarok, healing him for 5% of his health, and solidity.
-Arcing Smash: Deals x physical damage in a cone in fron of Tavarok. The damage is split evenly among players hit by Arcing Smash.
-Earthquake: Tavarok summons an earthquake at a target area. After 3 seconds, the earthquake rumbles dealing x physical damage and stunning all targets hit by Earthquake for 4 seconds.
-Crystal Prison: Tavarok encases 2 (5 in 25 man) players in a crystal prison, dealing 23% of their max health every second for 5 seconds, and stuns the target for 5 seconds.
Phase 1 lasts until 15% solidity.
Phase 2 - Becoming Brittle...
-Rock Body: The Sha power encases Tavarok is a magic cocoon, preventing all damage. However, Tavarok is still only stone, and enough force will still be able to shatter Tavarok completely. The front, left side, right side, and behind of Tavarok will all be exposed, and excessive force on a single side will be able to reduce Tavarok's solidity. Every 100 (250 in 25 man) spells or attacks done to one side will reduce Tavarok's solidity by 1%
-Unstable Magic: The magic surrounding the Sha Infused stones become unstable, the stones slowly drag over to Tavarok one by one. If they reach Tavarok, they heal him for 5% solidity. However, if a player intercepts a stone, they deal x shadow damage to the entire raid, and increase all shadow damage taken by 5% for 2 minutes, but gained 30% increased damage for 2 minutes. Both of these effects stack indefinitely.
-Foundations Exposed: Upon reaching 1% solidity, Tavarok's foundation of his very self is exposed for 10 seconds. Tavarok must take 800,000 damage in a single hit to be completely shattered, and die. If Tavarok does not take a hit that large, he will regain 5% solidity, and become immune again.
-Crystal Earthquake: If Tavarok is not defeated within 8 minutes, he will summon a crystal earthquake, stunning all players for 10 seconds, and deal 30% of their max health every second for 10 seconds.
Boss: Erekem
After the events of the Lich King in Northrend, heroes that would normally keep the monsters in Violet Hold at bay had other matters of focus, leaving the prisons fairly unguarded. Erekem agreed to assist Shaffar on the agreement a small amount of arcane energy is kept for Erekem to share with the Arakkoa. Erekem however refused the Sha's magic, feeling his was much more powerful.
Abilities
Phase 1 - The Twisted Shaman
-Erekem's Guards: In addition to Erekem, his two faithful guards were released as well. These guards come with their own abilities.
Erekem's Guards
-Gushing Wound: Erekem's Guard creates a gushing wound on a random target within melee range, dealing x damage every 1.5 seconds for 45 seconds. This damage is slow at first, but increases every 1.5 seconds. 15 second cooldown.
-Blinkstrike: Erekem's Guard teleports to a random target outside of melee range, dealing x damage, and immediately returning to his location. 15 second cooldown.
-Howling Screech: Erekem's Guard screeches, reducing the movement, attack, and casting speed of 3 random players for 20 seconds. 20 second cooldown. (Magic Effect)
-Loyalty: Erekem's guards are incredibly loyal to him, and refuse to see him fall. Every 10% of health Erekem is missing, Erekem's Guards gain a stack of loyalty, reducing the cooldown of their abilities by 1 second.
-Lightning Bolt: Erekem fires a Lightning Bolt at his target, dealing x nature damage.
-Chain Heal: Erekem attempts to heal himself and his guards, a successful Chain heal will restore 15% of one guard's health, 10% of the other's, and 5% of Erekem's health. (Interruptible)
-Earth Shock: Erekem shocks 3 (7 in 25 man) players with the power of earth, dealing x nature damage, and reducing movement speed by 25% for 10 seconds.
-Earth Power: Cast immediately after Earth Shock, Erekem causes the power of earth to explode from the targets hit by Earth Shock, dealing x nature damage to anyone with 10 yards of them every second for 8 seconds.
-Fury Windfury: If both of Erekem's guards die before he is below 30% health, Erekem will stop casting Lightning Bolt and apply Fury Windfury to himself, causing his melee attacks to do damage equal to Lightning Bolt, and two more times immediately on his target.
Phase 1 ends when both of Erekem's guards are dead.
Phase 2 - Insanity and Fear
-Spiritwalkers Rage: Throughout the rest of the encounter, Erekem can now cast while moving, and every 0.5 seconds Erekem is moving, he gains a 1% increase to damage, stacking indefinitely.
-Arrakoa Totem: Erekem places an Arrakoa totem down. While this totem is alive, Erekem cannot be interrupted or dispelled.
-Insanity Lightning Bolt: Seeing his loyal companions die enraged Erekem, empowering his Lightning bolt attack to do 50% more damage. However, Erekem's lack of control allows players to interrupt his Lightning Bolt.
-Earth Shield: Erekem places an Earth Shield on himself, causing all damage done to Erekem to restore 0.3% of his max health, lasts until dispelled.
-Earth Bolt: In Erekem's rage, his Earth Shock has turned into a mighty Earth Bolt, causing a bolt of earth to pierce three random targets, reducing movement, attacking, and casting speed by 25% for 10 seconds.
-Coming Earth: On one target hit by Earth Bolt, the Coming Earth will begin to form, dealing x nature damage to anyone standing in the coming earth. Every 5 seconds, the radius of the Coming Earth increases.
-Berserk: After 9 minutes, Erekem Beserks, filling the entire room with Coming Earth, and gaining Fury Windfury.
Boss: Yor, the Cursed Void Hound
Yor, a void hound once summoned, attacked, and killed by adventurers, is now one of Shaffar's most loyal companions. Yor has kept a close guard over Shaffar, and while not not being granted Sha magic, the sheer amount of magic surrounding Shaffar has leaked onto Yor, giving him a small taste of the power, of Sha.
Abilities
Phase 1 - The Cursed Hound
-Cursed Bite: Both of Yor's heads take a bite out of the target, dealing x shadow damage and reducing armour by 25%, stacks up to four times.
-Double Breath: After 3 seconds of casting, Yor first releases a fiery breath, dealing x fire damage over 2 seconds, causing the target to become singed. Yor then releases a breath of ice, dealing x frost damage over two seconds, causing the target to become shivered.
-Singed: The next source of frost damage the target takes is increased by 500%.
-Shivered: The targeted player cannot dodge, or parry for the next 15 seconds.
-Stomp: Yor stomps on his target, crushing them under his foot. The target takes 10% of their maximum health every second for 10 seconds. Stomp can be broken by dealing 1,500,000 (3,750,000 in 25 man) damage to Yor.
-Void Nova: Yor instantly deals x shadow damage to all players within 200 yards.
-Sha Power: The magic of the Sha flows through the air, slowly empowering Yor throughout the fight. Every 2 seconds, Yor deals and additional 1% damage with all his attacks.
(I know this one's sort of short, it's meant to be more of a gear check, because y'know, those are always fun!)
Boss: Xevozz, Prospector of Arcane
After being freed by Shaffar, Xevozz was indebted to him. Being a prospector of Arcane, Xevozz assisted Shaffar in gathering arcane energy to use for his army. Shaffar trusted Xevozz far more than the others, being an ethereal as well, and thus granted him both powerful Sha magic, and powerful Arcane magic.
Abilities
Phase 1 - Allow me to introduce myself...
-Ethereal Sphere: Throughout the entire encounter, Xevozz will periodically summon Ethereal Spheres. If these spheres are attacked, they are knocked back in the direction the attacker is facing. The attacker takes x arcane damage every time they attack the Ethereal Sphere. If an Ethereal Sphere is killed, it casts Arcane Buffet on the entire raid. Ethereal Spheres will slowly travel to Xevozz, if they reach him, Xevozz gains Arcane Overload.
-Arcane Buffet: Deals x arcane damage, and increases all arcane damage taken by 10% for 3 minutes.
-Arcane Overload: Increases the casting speed of Xevozz for the next three spells by 500%
-Arcane Missiles: Xevozz channels arcane missiles into his target, dealing x arcane damage every second for 5 seconds. Xevozz will still move, and stay within melee range of his target while channeling.
-Teleport: Xevozz teleports to a random corner of the room.
-Arcane Flash Wave: Cast immediately after casting teleport, Xevozz throws five sets of three waves of arcane, in the direction he is facing. Any player hit by an Arcane Flash Wave suffers x arcane damage, and becomes blinded, causing loss of control for 4 seconds.
Phase 1 ends at 80%.
Phase 2 - I have many new things to show you...
-Sha Power: Xevozz fully embraces his Sha power, Xevozz can no longer cast his arcane abilities.
-Shadow Force: Xevozz fires a force of shadow at his target, dealing x shadow damage.
-Flood of Darkness: Darkness floods the outer corners of the room, slowly filling the room with pure darkness. Players standing in the flood of darkness take x shadow damage every second.
-Looming Shadow: Xevozz places a Looming shadow inside of a player. This shadow will slowly drag the player into the Flood of Darkness, increasing in speed every 5 seconds. If dispelled, the Looming Shadow will jump to the player closest to them, continuing at the same speed. After the third time Looming Shadow is dispelled, it explodes, dealing x shadow damage to the entire raid, and increase all shadow damage taken by 25%, after which, Xevozz will summon a new Looming Shadow. If Xevozz is the closest to the player with Looming Darkness while dispelled, he will gain Shadow Overload.
-Shadow Overload: The next three Shadow Forces cast by Xevozz will be instant, and deal damage to the entire raid.
Phase 2 ends at 35% health.
Phase 3 - The Power of Arcane and Sha is mine!
-Twisted Power: Xevozz becomes overflowed with Arcane and Sha power, granting him new abilities.
-Magic Rush: An uncontrollable force of magic rushes through Xevozz's hands, dealing x arcane damage every 0.5 seconds for 5 seconds to his target, and causing them to take x shadow damage every 3 seconds for 30 seconds, this effect stacks.
-Flood of Arcane: When Xevozz gains Twisted Power, the entire room is filled with a flood of arcane, dealing x arcane damage every 3 seconds to the entire raid.
-Corrupted Sphere: Xevozz summons a corrupted sphere to attack the raid. This sphere will fixate on a random target, and slowly move towards it, picking up speed every 2 seconds. Attacking this sphere will cause the attacker to suffer x shadow damage. When this sphere is killed, it explodes, dealing x shadow damage to all players and causing all players to take 10% more damage from all shadow spells, for 2 minutes, stacks. If the corrupted sphere touches Xevozz, he casts Magic Supernova.
-Magic Supernova: Xevozz creates an incomprehensible explosion of magic, dealing 95% of all player's max health in damage.
-Shadow Wave: While Xevozz has Twisted Power, Shadow Waves will appear from a random wall in the room, traveling forward. Any player hit by a Shadow Wave will take x shadow damage, and will be knocked back 50 yards. Every time a Shadow Wave ends, a new Shadow Wave will appear. Every time a new Shadow Wave appears, one extra will appear.
After defeating Xevozz, players hear, from a distance: "Ah, hello my friends! As you can see, I have made many new renovations to my place of residing. You see, I have made quite a bargain with some new friends mine, and I am eager to show you my new wears. Come, let us catch up, I'm sure you have all been busy, as have I..."
Final Boss: Nexus-Prince Shaffar
After once being defeated at the hands of Azeroth's most powerful adventurers, leaving his Mana-Tombs in ruin, Shaffar plotted his revenge. Shaffar did not lash out in rage, or be consumed by anger or hatred, he planned. Once hearing of the influence of the Sha, Shaffar's plan came together, and he began the creation of his Arcane army. After acquiring the power of the Sha, Shaffar had the ultimate army prepared to march over Outland, consuming everything in its path. What Shaffar didn't know, however, was just how closely the Sha were watching him...
Abilities
Phase 1 - The Most Gracious of Hosts!
Upon Beginning Encounter: "Ah, I'm glad you could join me! You are in for quite a treat, my friends, you will be the first mortals to witness the uprising of my Arcane Army. Oh, you cannot stay long? I'm sorry to hear that. Here, let me give you a little taste of what will eventually give me a stranglehold over Outland..."
-Arcane Barrier: Shaffar is covered by an impenetrable Arcane Barrier, shielding him from all damage. This barrier lasts until all adds are killed.
-Arcane Soldier: Shaffar summons four Arcane Soldiers at the beginning of phase 1.
-Cleave: The Arcane Soldier instantly deals 100% weapon damage to its target, and 150% weapon damage to any targets next to them.
-Magic Blade: The Arcane Soldier enchants his blade with magic, causing his next five attacks to send a wave of arcane in the direction he is facing, dealing x arcane damage to anyone who touches it.
-Arcane Charge: The Arcane Soldier charges to a random player, stunning them for 2 seconds, and applying Overflow Magic.
-Arcane-Weaver: Shaffar summons three Arcane-Weavers at the beginning of Phase 1. These monsters cannot be tanked.
-Arcane Blast: The Arcane-Weaver fires a blast of arcane at a random target, dealing x arcane damage and increasing the damage of the next arcane blast by 10%, stacks.
-Arcane Flare: The Arcane-Weaver drops an Arcane Flare at a random target. After 2 seconds the flare lights, and begins to follow its target for 8 seconds, applying Overflow Magic to anyone within 10 yards of the flare. The Arcane-Weaver loses all stacks of Arcane Blast when this is cast.
-Arcane Explosion: At 5% health, the Arcane-Weave overloads itself with magic, causing an Arcane Explosion, dealing x arcane damage and increasing all arcane damage taken by 15%, stacks. This debuff does not fall off until the end of Phase 1.
-Overflow Magic: Deals x arcane damage every second for 5 seconds, and after 5 seconds detonates, dealing x arcane damage to all targets within 10 yards.
Phase 1 ends when all adds are killed.
Phase 2 - I will tend to you, personally...
"Oh ho ho! I expected nothing less than Azeroth's finest champions. I had no doubt you would posses the power to come in, swords swinging, magic flying, and reach my personal chamber. However, I'm afraid your courageous adventure has reached it's conclusion..."
-Frostfire Blast: Shaffar blasts his target with the power of ice and flame, dealing x frostfire damage, and slowing the target's movement speed by 15%, and dealing x fire damage over 20 seconds, both the slow and fire damage stack.
-Frost Nova: Shaffar fires off a massive frost wave, freezing all players in place for 10 seconds. However, one player will gain the debuff Arcane Mark. Frost Nova reduces the damage of Arcane Bomb by 50%
-Arcane Mark: This target is immune to the damage of Arcane Bomb, as long as they are not directly hit by it.
-Arcane Bomb: This ability will be dropped on top of the player with Arcane Mark, hitting the ground after 4 seconds. Arcane Bomb will instantly kill any player it directly hits, and deals x arcane damage to the entire raid on impact.
-Ethereal Beacon: At the beginning of Phase 2, and every 30 seconds after, Shaffar summons an Ethereal Beacon. These Beacon's cannot be tanked, and slowly move around the room, dealing x arcane damage to any player within 5 yards, and casting Arcane Bolt on random players.
-Arcane Bolt: Deals x arcane damage.
Phase 2 lasts until Shaffar reaches 40% health.
Phase 3 - How Exciting!
"My goodness, I have not had a battle like this in years! And silly me, forgetting to show you my latest tools in all this excitement. Behold! My Arcane Generator! This lovely contraption not only harnesses the power of any free-flowing arcane energy, but it directly infuses it into a vessel of my choosing. Oh, there's no need to ask, I'm sure you'd LOVE to see how it works."
-Arcane Generator: This machine slowly generates arcane power, and infuses it into Shaffar. Every time Shaffar casts Magic Tri-Barrage, his damage is increased by 1%, stacks.
-Magic Tri-Barrage: Shaffar fires a devastating mix of fire, frost, and arcane at his target. This spell has the same characteristics of Frostfire blast, but each cast increases the initial damage of Magic Tri-Barrage by 10%.
-Arcane Beam: Shaffar summons a beam of arcane over a random target. After 1.5 seconds, the beam begins to pulse, dealing x arcane damage every second to players standing in it.
-Humanize Beacon: Every 20 seconds, Shaffar humanizes one of his Ethereal Beacons. These Beacons have the same properties of their previous form, but now are able to be attacked and attack players.
-Blink: Shaffar teleports to a random corner of the room.
-Arcane Force: Cast 3 seconds after casting Blink, Shaffar channels a massive force of arcane in his direction, dealing x arcane damage every second and slowly pushing players backwards. Shaffar will channel this spell for ten seconds. When Shaffar uses this spell, all stacks of Magic Tri-Barrage are reset.
Phase 3 ends at 0%.
"Is...is this it for me...?"
Phase 4 - Prince Shaffar, the Monster of Arcane (Heroic Only)
"No...no, this is NOT! I feel, all this energy, flooding inside me...what, is happening to me?"
(Shaffar's skin glows black and white, his chest begins to expand with dark energy.)
"I feel....what, what is this? What are you doing to me? No, no! I control my Sha power! This was not in our agreeme-GYHAAAAA!!!"
(Shaffar is lifted into the air through Sha power. Facing downwards, his chest is bent backwards, from inside of it, a massive Sha monstrosity begins to crawl out from it. This creates expands massively in size, with Shaffar's body still attached.)
-Monster of Arcane: This Massive beast crawled out from the insides of Shaffar. This being has health equal to 35% of Shaffar's maximum health.
-Pulse of Death: The Monster of Arcane releases a pulse of pure death, dealing x shadow damage to all players. If a players is hit by Pulse of Death ten times without taking arcane damage, they are instantly killed.
-Arcane Bile: The Monster of Arcane spits out Arcane Bile at a random location. This pool of bile lasts 20 seconds, and dealing x arcane damage to any player standing in it every second, and increases all arcane damage taken by 10% for the remainder of the fight.
-Whisper of Madness: The Monster of Arcane whispers pure madness into a random player, causing them to become mind controlled. This mind control will be broken if Whisper of Seduction is on the mind controlled player.
-Whisper of Seduction: Shaffar whisper's into a random player. If this ability is dispelled, it will jump to the nearest player. If it is not dispelled after 5 seconds, the player will be mind controlled. Now that you mention it, he IS rather charming...
-Terror Beacon: After 15 seconds, and every 15 seconds after that, the Monster of Arcane summons a Terror Beacon at a random spot. These beacons will move around the room at a moderate speed, fearing anyone they touch for 3 seconds.
-Unstable Monstrosity: At 10%, the Monster of Arcane becomes unstable and begins to deform. Splashes of arcane hit all players every second, dealing x physical damage and increasing all damage taken by 5%, stacks.Last edited by Azshira; 2012-09-14 at 06:14 PM.
-
2012-07-22, 07:56 AM #6Immortal

- Join Date
- Jan 2009
- Location
- Quel'Thalas
- Posts
- 7,034
Highest Position: 1st on the 23rd July. Remained on leaderboard: 7 days.
Draconic Ascension
Background: The dragons, in general, have decided that the mortal races of Azeroth are the source of pain and suffering on the planet and must be wiped clean if Azeroth is to last. To this end the Aspects have banded together to regain their titanic and powers and cleanse the world of mortals.
General Raid: The Dragons have managed to create an elemental plane which now houses their massive, joint, sanctuary. The entrance to this plane can be found within a citadel built over the Malestrom. Within this Sanctuary, each of the Aspects have erected a citadel that matches their nature
The first 5 bosses can be tackled in any order
1. Tyrygosa. Kalecgos's consort resides within the shimmering halls of the Sapphire Nexus bending the ley-lines of Azeroth to this new plane. general look of area: Nexus+Dalaran
2. Merithra. The heir to Ysera, Merithra resides in the Emerald Forest, where she works to turn the ancients to the Dragon's call. Sholazar/Un'goro/Feralas on steroids
3. Xerestrasza. from within the Scarlet Enclave (giant fuck tree-house complex) Xerestrasza works to bend the natural forces in an attempt to bring Krasus back to the realm of the living
4. Anachranos. Anachranos guards the Hourglass of Eternity within the City of Sand (Tol'vir+Plane of Air). With it he hopes to undo the mortal races by erasing them from history
5. Sabellian. As Wrathion's only surviving brother he works tirelessly within the Obsidian Tower (it's in a volcano, obvi) to tap the necromantic powers that Nefarian and Neltharion held. His goal is to fully resurrect those Blacks whom the mortal races slew.
6. Aspect Council. The Dragon Aspects (Kalec, Alex, Wrathion, Ysera, and Nozdormu)are assembled within their enclave in order to perform a ritual that they believe will empower them beyond what they were originally granted.
phase 1: I'll handle this Each dragon takes on their mortal form in order to defeat the Heroes, but the dragons are cocky, and as each one falls (brought to 50%) they refresh the Heroes (full health, full mana, cooldowns reset) thinking they can outdo their brothers and sisters. You can choose which Aspect is engaged first, but from there it follows R-Black-G-Blue-Bronze. Each Aspect is a two phase fight, with 100-75% being in mortal guise and 75-50% being in their draconic form. The last aspect fought does not refresh the party before the next phase
Phase 2: Finish them minions The aspects call upon their loyal servants to deal with the now weakened heroes while they focus on the ritual at hand. The general format is CC wave-AoE Wave-Miniboss (Afrasastrasz, Serinar, Itharius, Kirygosa, Chromie), repeated 5 times. This is about equivalent to the Hagara trash.
phase 3: Dragon Duos. 3 sets of phases, this should bring the dragons down to 25% health. Alexstraza (dragon) and Ysera (mortal), Wrathion(mortal) and Kalec(dragon), Nozdormu(mortal) and Murozond (dragon). After each one of these the party is refreshed, like I said the dragons are cocky. groups transition when one of them reaches 25% health
Phase 4: The Dragon Aspect With a final burst of power the Aspects finish their ritual but it does not work quite as planned, rather than empowering each of them they are joined together into the perfect Chromatic Dragon (Chromatus on crack). the burst of power refreshes the heroes (much to the chagrin of the Aspect) and now they must defeat this creature. The Dragon Aspect has the cumulative health of the remainder of the aspects (think Ascendent Council) and be at 75% full.
7.(optional, highly recommended) Galakrond. Through the efforts of Sabellian and Xerestrasza the Aspects have managed to raise Galakrond as a massive Proto-Wyrm. Defeating him will turn him to the Heroes' side and he will join in the final confrontation, providing a damage buff and tanking The Dragon Aspect from 75%-55% at which point The Dragon Aspect will overhwelm him and he will fall. if he is not defeated he will assist the Dragon Aspect and carpet bomb the raid (ala that Halfus drake) until The Dragon Aspect reaches 30% at which point the assisting heroes (Jaina(A), Baine(H) (yeah, Baine not Thrall), Malfurion(A), Tirion(N), and Rommath(H)) will finally take him down.
Lore result: The dragons are defeated and their power seeks out the most powerful conduit in the area, the Assisting Champions are granted dominion over a different Aspect's realm (I think you can figure it out) as a true age of mortals blah blah blah
finishedLast edited by Azshira; 2012-07-30 at 10:42 PM.
Theron/Bloodwatcher 2013!
 Originally Posted by Alsompr

-
2012-07-22, 09:13 AM #7The Lightbringer
- Join Date
- Apr 2009
- Location
- Cork, Ireland
- Posts
- 3,041
You'll need to post it here and shorten it to 6 bosses (7th boss is optional as a special unlock) Originally Posted by -Apathy-
---------- Post added 2012-07-22 at 10:26 AM ----------
The raid size can be anything you want as long as it is/was within WoW limits (so 40man is allowed but not 60 for example). The difficulty can be whatever you like, the idea basically is just bosses you'd love to make a raid out, it doesn't exactly matter the difficulty, people can use their imaginations there. However, if you wish to add difficulties feel feel but it's not needed. You can absolutely throw all end bosses into your raid, make it as creative or as basic as you want. I'll edit in a very brief example into my post. Originally Posted by Blueobelisk
Last edited by Azshira; 2012-07-22 at 09:16 AM.
-
2012-07-22, 10:17 AM #8Herald of the Titans

- Join Date
- Aug 2009
- Posts
- 2,751
Highest Position: 2nd on the 23rd July. Remained on leaderboard: 4 days.
The Raid Name:
Karazhan Crypts
Location:
Below Karazhan in Deadwind Pass.
Lore:
These crypts were sealed off for years. The terrible things here, once magically locked up there by Prince Malchezaar and Medivh, haven't seen daylight for a long long time. But because Karazhan has fallen the magical shields that hold them in the crypt are broken. The creatures broke the sealing and left the place which got the serious attention of the nearby settlements. Dark Shire (alliance) and Stonard (Horde) have their soldiers ready to defend against these unknown evil.
Dungeon layout:
The dungeon starts with the Karazhan Crypts leading the way downwards. Then you find a room with a strange portal thing. This portal brings you to a upside down version of Karazhan (stole the idea from Castlevania: symphony of the Night ) which is located in a unknown realm where an Old God is located. It seems nothing has happened to Karazhan, cause most of the NPC's we killed in Karazhan still lives here. Even the tower is undamaged. The road towards the tower's top (all the to the bottom) is a bit strange cause you walk on the ceiling this time. Even some enemies attacks you upside down.
Boss 1: Dark Spirit of Lothar accompanied with skeletons, scorpions, fire elementals and daemons.
A strange portals opens after the defeat of Lothar. Go through it to reach Inverted Karazhan.
Boss 2: Attumen the Huntsmen and Midnight (not undead, but alive)
He is still inside the stables.
Boss 3: Nielas Aran (Father of Medivh)
Boss 4: Arcanagos (Nightbane before he turned undead)
Boss (optional): New Chess-like event (Because all chesspieces falled down the chesslike game Djambi is used instead.)
Note: this boss can be fought at any moment after you defeated Dark Spirit of Lothar.
Note 2: Defeat Attumen the Huntsmen makes your horse-pawn 25% stronger, Defeat Nielas Aran makes your wizard-pawn 25% stronger and defeat Arcanagos makes your dragon-pawn 25% stronger.
Boss 5: Med'an (Wicked Guardian of Tirisfal)
Boss 6: 4th Old God (name not yet revealed)
An image to get an idea how it will look like:

Idea is finished.Last edited by Azshira; 2012-07-26 at 10:39 AM.
-
2012-07-22, 10:43 AM #9Deleted
Highest Position: 1st on the 23rd July. Remained on leaderboard: 26 days.
The quest for the Sololibutron.
High Tinker Mekkatorque needs your help the sololibutron, has been stolen you are to go to his lab and look for clues and hunt down the perpetrator, oh and by the way the solibutron is mildly unstable so you better hurry. Oh and when we say mildly unstable its not like it will blow up the universe or something like that if it where to go off no no no nothing like that only azeroth minus silithus nothing ever changes in silithus. Oh yes and we need the horde to help out to here.
Instance entrance is at Gnomeregan.
First Boss Mekkatorques Lab in gnomeregan
After fighting your way through the trash you come to the lab where you encounter:
Robo-undead Kaelthas: by the use of gnomish robo technology robo-undead kaelthas is back, and yes tempest keep and magisters terasse was only a setback.
In the ensuing bossfight he breaks jars that spawn clone hoggers, you have to offtank and kill them. Untill at 20% he breaks a big jar from which a megaclonehogger emerges megaclonehogger swallows kaelthas whole and you fight him. When he dies you cut out kaelthas from his stomach and kill him.
Second Boss: Anub'arak
After the fight an investigation commences and in a corner you find a rift in spacetime. You jump through it and find yourself standing in a corridor in ulduar. After engaging some nerubian spidertrash you end up infront of a door. Off course Anub'arak spawns now he is the gatekeeper and you have to defeat him having been risen ones again by his new mistress he lives only to server her.
From his quite decomposed body various kinds of bugs spawn.
After the fight mekkatorque appears and informs you that this is an unknown sidecorridor in ulduar and yes well the door is apparently locked. There is no doubt that the one who stole the sololibutron has run through the door and is hidding behind it. Unfortunatly the door is locked but fear not mighty heroes cause he knows exactly how to open the door. Back when Thrall and the aspects where about to fight deathwing he was working on a multi-super-enhanced-swiss-macgnomer-armyknife that could open that door unfortunatly his trusty lietenant(that caried the thing) was eaten by deathwing right before deathwing set off towards the maelstrom. (a cutscene where deathwing eats the gnome schould be included)
Third Boss: Inside deathwings body.
By the use of the caverns of time and the new improved gnomish world enlarger and finkle einhorns superprotective enviromental suits. You are to enter deathwings intestines from his rear end. As you fight your way thorugh his intestines up to his stomach in a spinelike fight, before thrall fires of his deathstar laser and destroys the prototype.
Drenched in deathwing stomach fluid you arrive back at ulduar and open the door. And look down a long deep shaft filled with kobolds"You no take candle" trash. And from deep down the shaft a booming voice cries out every 5 minutes: "TOO SOON YOU HAVE OPENED THE DOOR TOO SOON!!!".
Fourth boss: Deep under ulduar: Flaming Nefarian and burning Onyxia.
Ragnaros the firelord stands in the middle and he is about to make nefarian and onyxia into burning flaming fire elemental dragons, You know dragons of fire that do like dragon stuff.
First you fight the combination of onyxia and nefarian onyxia lays eggs that spawn dragons and nefarian has his class call.
Fifth Boss: Ragnaros the firelord.
Its Ragnaros so off course he does his thing. But this time around he has a new major domo. But the major domo turns against him, ragnaros new major domo is Nat Pagle wielding the Ashbringer. In this fight you fight off fireadds and keep them away from nat, while nat pagle beats ragnaros to death.
After examining the area you find another spacetime rift. After jumping through it you end up in the black temple, high above on a throne sits Maiev Shadowsong driven insane from lack of content you know keeping Illidan locked up was her content for 10.000 years, wait a minute 10.000 years are we sure she didn't get a bit wacko during that period oh well back to the story.
Sitting on a throne Maiev Shadowsong boasts about how she perverted Mekkatorques technology for her own agenda. Then the trash spawns and you have to fight your way through badly cloned Illidans.
Sixth and final boss: Maiev Shadowsong
She teleports around alot and at 15% a mysterious shadow warrior appears and helps you out burning her mana so she cant blink around anymore. You trap maiev and it is revealed that the real deal Illidan helped you out (yea no shit sherlock off course it was him who else...). He picks up a package and jumps through a rift back to kil'jaeden, on his way out a slip of paper drops. Mekkatorque picks it up looks at it and reads aloud his recipe for blasted boar. Apparently Maiev had stolen a package with blasted boar and his recipe for it and not the Sololibutron, now where is the sololibutron it's not like you let a weapon of gnome destruction just lie around somewhere, pondering that question Mekkatorque leaves you. While you ponder how it is that the bad gys always return^^
Seventh Boss (Optional heroic boss) Illidan stormrage.
Its a chase through the rift and after illidan, to get back the package and the blasted boar, so that you can make a giant feast in oggrimar or stormwind, from which everybody on the server can eat for 2 hours and get a special food buff.
Edit: the Procentual Nerf will be caused by Gnomish combat engineers who drill into the area and have set up mental destabilisers.
The EndLast edited by Azshira; 2012-08-18 at 10:25 AM.
-
2012-07-22, 10:55 AM #10The Lightbringer
- Join Date
- Apr 2009
- Location
- Cork, Ireland
- Posts
- 3,041
Just added 2 new rules there:
- Make your raid idea presentable.
- EXTREMELY IMPORTANT: When you are finished your raid, make an indication that it is finished and that you are not updating it further, once this is done it will be considered for the leaderboard.
This just ensures that your piece is ready for the leaderboard.
Mistuhbull I'd love to fight those dragons, very creative dude and the optional boss tying with the final boss, superb.
Zeor nice raid, an inverted Kara, awesome. The added picture is brilliant +1 to creativity!
Dax75, I laughed my ass off, well done.Last edited by Azshira; 2012-07-22 at 12:24 PM.
-
2012-07-22, 12:27 PM #11Deleted
Highest Position: 4th on the 23rd July. Remained on leaderboard: 2 days.
Battle for the Undercity II
Having survived again from the adventurers in Naxxramas, the lich Kel'Thuzad is more than aware of the identity of the new Lich King. Due to the fact that he served the former hosts (Ner'zhul/Arthas) willingly, he refused to bend his knee to Bolvar, and raised a significant Scourge army of his own, as well as gathering the surviving Scourge members, who retained their free will, under his leadership. Now he plans to take over Undercity as his temporal headquarters, kill the Forsaken so he can reanimate them again into the service of the "true" Scourge, and ultimately challenge the fallen paladin to become new Lich King. Worst of all, the first part of his grand design is already accomplished, with Sylvanas captured.
Battle for the Undercity II takes place (obviously) in Undercity, and is a 6 (7 in heroic) boss raid. There are two entrances into the actual instance, one at the front door in the ruins of Lordaeron, and the other at the sewer entrance near the Scarlet Tower. This means that if the raid decides to pick up the main door entrance and the ruins section, the first boss beyond the sewer entrance is optional, and the other way round. The following 4 bosses can be killed in desirable order, and finally the 7th and heroic only, Kel'Thuzad. The doors that lead into the royal quarter remain shut in normal mode, even if you clear the whole of other instance.
Ruins section
Timmy the Destroyer
Despite being killed by heroes at the burning streets of Stratholme, Timmy the Cruel was again reanimated by Kel'Thuzad to do the bidding of the "true" Scourge. Receiving a mighty empowerment from the Archlich, Timmy has become the most powerful ghoul ever in Azeroth. He is fought in the throne room, where he is summoned into by Kel'Thuzad after the first players enter in.
Sewer section
Ramstein the Gorger
Becoming infamous after killing Nathanos Marris, Ramstein was rebuilt by the surviving Cult of the Damned members under the orders of Kel'Thuzad. Using the remains of several other abominations, he's power now rivals the late titanic monstrosity, Patchwerk. Players fight Ramstein at the end of the sewer pipe, much like where that giant worm boss was in Battle for the Undercity quest.
Inner city
Professor Putricide
That's right, folks! The brilliant professor is back! Feeling to be too uncomfortable under the service of Bolvar, Putricide decided to join Kel'Thuzad and his "true" Scourge. He is fought in the laboratories, where the alchemy trainers reside.
Blademistress Asira
Killed in Dragonblight during Deathwing's assault, Asira's body was found and resurrected by the surviving Cult of the Damned members. Afterwards she, along with them, joined Kel'Thuzad, and took her place as the most skilled blade user in the "true" Scourge. She accompanied the Archlich during Undercity's takeover, and is fought in the Rogues' Quarter.
Devlin Agamand
Devlin Agamand was resurrected once again by Kel'Thuzad, using his stolen remains. Now more powerful than ever, this sadistic skeleton mage now resides in the Magic Quarter.
Scourgelord Mortuus
Mortuus, along with several other Forsaken, fell before Kel'Thuzad's forces during the city's takeover. He was then reanimated to do the Archlich's bidding. The only way to redeem him from the mind control is to venture into the War Quarter, where he resides, and slay him.
Final part (heroic)
Kel'Thuzad
Final boss of the raid. Kel'Thuzad resides in the Royal Quarter, at the seat of Sylvanas, where he tries break her strong will. Should he accomplish, the Forsaken could be wiped out with ease without their queen.
In the end the Archlich and his phylactery are ultimately destroyed, but with a sacrifice that touches the very history of the Horde, and even the Alliance.
The End
Edit: added a new boss, with Kel being heroic only.Last edited by Azshira; 2012-07-26 at 10:39 AM.
-
2012-07-22, 12:36 PM #12The Lightbringer
- Join Date
- Apr 2009
- Location
- Cork, Ireland
- Posts
- 3,041
Nice history thrown in there Kraspotatius. Nice little convincing lore too for each of your bosses, good choices. I really like the amount of choice you give the raid leader, makes it interesting! I have one word: TIMMY!
With your edit it would make people shoot for heroic asap to fight him, good journey
Last edited by Azshira; 2012-07-22 at 12:59 PM.
-
2012-07-22, 01:31 PM #13Deleted
Highest Position: 3rd on the 23rd July. Remained on leaderboard: 5 days.
Deep Water Horizon!
Story:
News of a deep underground army forming that are threatening to destroy the world as we know has reached the leaders of your faction, as an experienced adventurer the leaders has requested that you and your co-adventures travel deep down into the ground and seek out and destroy the leaders of these dangerous creatures.
Intro leading up to1st boss:
The journey begins with you travelling to see Baron Revilgaz in Boot Bay, who shall assist you in your journey deep into the abyss. He is standing by at an already prepped Zeppelin. As soon as you're ready you talk to Baron Revilgaz and the flight starts, as the zeppelin starts to move and you become fully airborne you enter the instance. And this is where the real experience starts. As you're flying out towards The Maelstrom the zeppelin encounters a mechanical failure and you're forced to abandon the shuttle. Baron Revilgaz's assistant "Hansi Gazprom" starts handing out parachutes to make sure everyone can get off the zeppelin, as the zeppelin drops altitude you see an island not far from your current position, and the zeppelin is heading towards it. As time goes the zeppelins gasoline driven engine explodes and sets fire to the zeppelin, making it drop into the sea. As you land on the water you're forced to swim towards the island or die of fatigue. As you approach this small island in the middle of nowhere you realize that the island is inhabitanted by foul creations that fit the description you've been told. You're now all standing on the beach head surrounded by foul creations, as the zeppelin blows up a final time the foul creations go into hostile mode and attack you if you're on the beach, as you kill these off Hansi Gazprom suggests that you seek refuge in the woods and you start exploring the island. As you walk through the woods you see a giant mine ahead. You decide to enter it on request from Hansi Gazprom, and see what they could have been mining here. As you progress through the mine it collapses and your entire raid falls down into a river with a heavy stream, and you get dragged further down into the ground. As you're swimming downstream you encounter the first raid boss.
1st boss
A giant crocodile called "Rotbite" (same model as mauradon Rotgrip just much bigger).
Intended for 25m hc for now, but you can easily fix timings for 10m.
As you can't cast while moving there are some pieces of tree floating along on the river that the casters can jump onto and dps/heal from (think floating discs on malygos, only for casters and not for the melee). Melee and tanks can dps/tank from the start. You will be able to maneuver around in the river, but at a very slow pace due to the strong flow.
Every 20 seconds Rotgrip will shallow the closest person to the tank and that player will go into his stomach where they will be burnt by acid, while inside the stomach they will do +500% dmg, but will die after 1minute from the acid damage which increases in effect as time goes.
Every 10 seconds Rotgrip will flap his tail in the water causing ripples to form in the water (which are impossible to avoid) which will do X-amount of dmg divided among all players (I haven't really figured out the exact number, but you get the idea).
Every 45seconds or so Rotgrip will claw the tank with his paw stunning him for 10 seconds, making him unable to defend himself and thus enabling critical hits which can kill him, so you will need an off tank to taunt or an impressive cool down rotation.
After 5 minutes you will have lost 15 of your raid crew to the shallow effect, and as such the tail dmg will start to hurt a lot.
After 6 minutes 40 seconds you will only have 5 people left outside and the tail bash will start one-shotting.
After everyone outside is dead Rotgrip will go into frenzy mode rolling around in the water, cause people inside the stomach to get acid burns 100% faster and as result they will die within 30 seconds.
After 7minutes 20 seconds, rotgrip will fall off the edge of a giant waterfall and you will all die as Rotgrip hits the ground beneath. Hansi Gazprom saved his parachute and managed to use it to survive the massive fall, so he resses you all with his mass res ability and you find a chest with some loot nearby.
The encounter is intended for 1-2 tanks, 4-5 healers and 18-21 dps with a maximum of 15 ranged classes being able to dps/heal at the same time.
If you all die and are forced to release you will be ressed outside the mine and Hansi Gazprom will convince you to give it another attempt, you will not be able to release before everyone has died and the encounter has stopped and everyone is dead. The encounter will automatically stop after 10minutes regardless of situation to ensure bugs won't ruin the encounter.
Story leading up to 2nd boss
After you're done with looting you talk to Hansi Gazprom and the adventure continues. Talking to Hansi Gazprom starts a trigger and you see that Rotgrips corpse is plopping the hole that the water is suppose to flow into, so the water is now rising on the ground you're standing on. Hansi Gazprom points to a tunnel and you start running through it while killing some trash mobs that resemble the trash you meet in Stone Core only much harder, after running for a bit you find a big opening with giant diamonds hanging from the roof. As you move into the opening, you trigger the 2nd boss fight.
2nd boss
A giant Gyreworn called Corbolt (same model as Corborus in Stone core only much bigger).
Corbolt will emerge from the ground and start to move towards you.
He does very heavy tank dmg and as such it's recommend to have an assigned healer or two spamming the tank full time, as even a short healing spike could result in certain death to the tank.
Corbolt will go underground every minute.
While underground Corbolt will cause earthquakes which will make the ground shake and some of the giant diamonds from the roof will fall, shadows will display where they will land, and they will one shot you if you don't move, once they land they will break into small diamond mobs which will attack you.
Every earthquake will grow in magnitude and release more and more diamonds.
After 6 earthquakes the amount of adds will be quite overwhelming (imagine spine hc after 5 tendon burns).
Every time Corbolt emerges from the ground he will open up the ground, causing some massive holes that have fires burning at the bottom of them. The tank should drag Corbolt away from these holes as they will expand every time Corbolt forces an earthquake and as such if Corbolt is tanked to close to the holes it will consume the tank when Corbolt submerges the next time, but at the same time you have to think about where you'll be tanking him, because eventually the whole floor will have collapsed if you do it wrong, and this is also the "hard enrage".
The encounter is intended for 1-2 tanks, 4-5 healers and 18-21 dps.
Story leading up to 3rd boss
After you've reduced Corbolt's health to zero. Hanzi Gazprom will appear from his hiding (he managed to sneak away). Once you talk to Hansi Gazprom you will force another trigger and you will slowly start to see the water coming from the tunnel you came from. Hansi Gazprom looks down into one of the holes in the ground that Corbolt has formed and sees that the fire has gone out due to the water flowing down into the holes and exquisiting it, so he suggests you jump into it and see where they lead as you have nowhere else to go from the looks of it.
As you reach the bottom you can see the massive tunnels that Corbolt has formed, as you begin to run you see the water rising behind you. Hansi Gazprom suggests you run towards the end where the tunnel goes upward, so you do that. As you're running through the tunnel Hansi Gazprom starts talking about it getting very hot all of suddenly and you start to see red glowing light at the end of the tunnel, as you reach the end of the Tunnel you see a massive lava pool with some narrow paths leading to the 3rd boss.
3rd boss
A giant fire elemental boss called Baron Geddon (Same model as MC).
Baron Geddon has an aoe effect that pulses every 2 seconds throughout the fight, dealing massive aoe dmg from the start, standing in packs of 5+ within 10 yards of each other will increase the dmg by 20%.
Every 30 seconds Baron Geddon will cast a magic dispellable debuff on a random caster with mana, switching between healing specs and dps specs. This debuff will drain 1% mana every second till dispelled. Once dispelled it will cause Baron to become enraged and grow to 3x his size and the ground under the person that was dispelled will rise and the lost mana will be returned to the caster. He will now do 200% dmg and raid cool downs should be used. Also he will make the lava rise and you will be forced move everyone over to the position where the debuff got dispelled.
Every 45 seconds he will also cast another magic dispellable debuff on a random player (tank aside) that will work like living bomb, only it will kill anyone within 15 yards and do dmg equal to 50% of the players health when dispelled, the target will take very high dmg as long as the debuff is not dispelled and after 1 minute it will blow up regardless. This debuff will never target a player that already has the other debuff.
At 20% the boss will go into enrage mode increasing his damage output by 50%, but also increasing his damage taken by 50% and trigger a one minute kill or be killed cast.
Recommend setup is 1 tank, 17 dps and 7 healers
Story leading up to 4t boss
After he dies Hansi Gazprom comes running and you talk to him to trigger the next part of the adventure. Once you talk to Hansi Gazprom you will see the water flowing from the tunnel going into the lava and creating huge stream clouds. These water vapor clouds go up under the roof, and some rocks begin to fall down around you. Suddenly an earthquake hits and you see the rocks are moving around and suddenly they form the 4th boss in the instance.
4th boss
A giant stone elemental boss called Garr (same model as MC)
Garr has an affect which steals all magicable buffs and reflects all magicable debuffs (curses to!). So he steals all your buffs, all your hots etc. but he reflects your dots back to you, so certain classes are rather bad here and you will have to rely on direct dmg and nukes.
Every 25 seconds he will cast a magicable dispellable debuff on a random player that when dispelled will jump to another target (preferring targets within 5 yards), after 15 seconds the debuff will trigger and will make the target unable to cast or attack anything, he will be on fire. Every second he will lose 1% health and everywhere that target goes will leave a trail of fire on the ground (think of what the adds on ragnaros did doing transition to 3rd phase). If the player dies the debuff will jump to another target and you will have 15 seconds to try to get it onto a decent target before the spell triggers.
Every 3 minutes of fighting Garr will do a blast wave like effect exquisiting all the fires on the ground, but making small elementals appear in their place, which will run towards people and blow up, knock back and do some aoe dmg. Multiple explosions at the same place will cause deaths.
There's no enrage on this, but the debuff will not fade before the boss is dead, so eventually you'll have 25 players unable to cast or dps and you'll just end up dying because you're on fire.
1 tank, 20 dps and 5 healers.
Story leading up to 5th boss
Once defeated Hansi Gazprom instructs you to give him the pieces for the Talisman of Elemental Bindings (like a quest). He then combines the two parts and says some words in a language you don't know, and a portal opens up.
Upon entering the portal you find yourself on a large floating piece of rock high in the skies (think Avatar(the movie) landscape). Here you encounter harpy trash mobs that you kill as you go on, the initial rock is the highest floating rock and you will have to use levitate/slowfall to get to the other rocks. Upon reaching the last rock, which is empty you can hear loud wing flaps from underneath. A large Harpy comes flying up to you and this is the 5th boss.
5th boss
A giant Harpy like boss called Aviana, the Lady Raven (Same model as Aviana in Mount Hyjal)
Aviana has several abilities. She doesn't need to be tanked as she does no melee dmg, instead she flies over the raid dropping eggs that spawn small harpies that need to be picked up and killed throughout the fight, and they do moderate aoe dmg upon attacking. Only ranged classes will be able to hit Aviana.
Every 20 seconds she will randomly grab a player and take him into the skies, while in the air a melee class gets a +200% dmg modifier, but also takes 30% of his health in dmg per second, after 15 seconds she will release this person and the person will need slowfall or use his parachute for the drop or he will die.
Every 3 minutes of killings adds the Aviana will do a large emote scream and 6 Large harpies will land on the ground which do unhealable dmg if they hit their target, they are however blinded and can be slowed, but have too much health to be killed so they will have to be kited. Aviana will cast debuffs on random players (-tanks) so the Large harpies can get a scent of the players, those players will need to kite these harpies around for the duration of the fight.
As Aviana hits 20% she will call upon another 6 large harpies (making it a total of 18 kiters needed if dps is on par) and she will grab a tank for the remaining part of the fight, thus a secondary tank will have to pick up the remaining small adds.
Recommend setup:
2 tanks, 3-4 healers, 18 dps.
Story leading up to 6th boss and final boss
Upon killing the Aviana you hear Hansi Gazprom cheering, when you talk to him you trigger the next part of the event.
This is where things get really interesting. A floating ship approaching on the horizon. Muradin Bronzebeard is aboard (alliance side, not sure what the horde counterpart is). He yells tp you not to trust Hansi Gazprom, he is in reality Lord Victor Nefarius and is trying to lure you into releasing Neputalon from the ocean depths through the Talisman of Elemental Bindings, it has all be one big hoax created by Lord Victor Nefarius. You look at Hansi Gazprom and then he reveals his true self and that he is Lord Victor Nefarius. He thanks you for getting rid of Aviana, the protector of the Seal of Water. Muradin Bronzebeard yells for to come aboard and man the cannons on his boat before Nefarian has time to release Neputalon.
6th boss
A giant Dragon like boss called Neferian (Same model as nef in BWD)
There are 4 cannons on the flying ship that needs to be armed by raiders, these guns serve as artillery to do massive aoe dmg to the spawning adds throughout the fight, but will hardly do any dmg to neferian.
Nef will spawn some liquid adds throughout the fight, these adds have lots of health and should be primarily killed by the gunship, and will ress themselves after a minute, as the platform gets smaller the amount of adds will be quite overwhelming.
Every 5 seconds he will fear (horror) 4 dps for 5 seconds, and silence 2 healers for 10 seconds.
The adds will need to be off tanked, as the artillery shells don't do enough damage to kill them quickly. If the adds get breathed on they will do +500% dmg, so they will need to be kept away from him.
Nefarian like any other good dragon breaths in a frontal cone, so he should be turned away from the raid.
He also casts a debuff on the adds every minute that enable them to ress themselves. The debuff can be picked up by a player from the dead mobs and will prevent them from ressing, it will however increase dmg taken by the breath by so much that you will need some kind of major cool down to survive, if you do manage to survive the breath you will do 500% more healing/damage for 15 seconds to nefarian at which point the debuff will expire. A player can only have one debuff at any given time.
Neferian will also break a part of platform off every time he breaths, making the platform smaller for every breath.
Once neferian hits 10% he will get enraged and do 50% more dmg on breaths and 20% more melee/tail dmg, meaning a tank will need a cool down for every breath to survive, and surviving the breaths with a debuff is almost impossible without blowing all your cooldowns.
Recommend setup: 2 tanks, 5 healers and 18 dps.
If the raid can manage to keep nef alive till the last piece platform is gone it will trigger a heroic only part. The entire raid needs to have the debuff and survive the breath without anyone dying, so all major raid cool downs should be used.
The heroic only part makes Neferian try to escape only to hit the boat and die, but it disables its flying abilities and it crashes into the last piece of rock, and you all fall helplessly towards the ocean, doing the fall you see the ocean turn into a massive maelstrom, which you get sucked into, at the bottom of the Maelstrom you face off with Neptulon the final boss.
7th boss
A giant elemental made of liquid called Neptulon (model throne of the tides).
This is a rather short fight. It's an extension to the nefarian fight.
As everything is covered in water you only have 3 minutes because you run out of air or the massive pressure from the water makes your body collapse.
The fight starts off with Neputalon mind controlling all your tanks, the tanks will swim around trying to kill/interrupt anything that heals, and should be cc'ed as much as possible (note that pvp cc times apply as does DR's). The tanks gains a lot of extra health and take 50% less damage.
Neputalon will spawn some adds every 30 seconds that will need to be kited as you have no tanks, as the melee damage is too high for a non-tank to soak them, bear form and blood presence will trigger a mind control from neputalon as well.
The adds do aoe dmg that increases the longer they stay alive. The adds can be killed, but will turn into black creep, so they need to be killed off at the sides. The black creep does massive dmg will expand as time goes (think sinestra black pools), making the kiting space very small doing the last 30 seconds of the encounter if you kill the adds quickly.
Neputalon will also cast a debuff every 30 seconds that can be either poison/magic/curse or disease but has the same effect, if not dispelled before expiring after 15 seconds it will instantly kill the person, and if dispelled it will jump to a new target and reset the timer and dispel grade.
1 minute before your 3 minute is up Neputalon will start executing the people that have done the most damage to him every 5 seconds.
Muradin Bronzebeard has brought some swimming apparatus' from his nearby ship that will work like underwater motorbikes that will increase your speed rapidly, so you can kite the adds. There's only 3 apparatus' though.
Muradin Bronzebeard tries throughout the fight to break the mind controls on the tanks and he is rather successful breaking them every 15 seconds for 15 seconds. Because the tanks still have the health buff they can go into the black pool and gain vengeance and do a lot of dmg aswell.
After Neputalon dies a massive wall of water shoots up into the air and the ocean floor is cleaned of water, you hop into the sunk flying boat and water returns and Muradin Bronzebeard gives you a chest for your success, as the boat slowly leaves the ocean floor.
The End!Last edited by Azshira; 2012-07-27 at 10:21 AM.
-
2012-07-22, 04:10 PM #14The Lightbringer
- Join Date
- Apr 2009
- Location
- Cork, Ireland
- Posts
- 3,041
Creative, I like how Neptulon is activated
There are some mechanics that baffle me that would suggest some rather unfair setups me thinks, but overall nice ideas. The little stories to each boss is nice and seeing as Lord Victor always loved disguises it fits him perfectly for a grand betrayal.
-
2012-07-22, 04:22 PM #15Deleted
Well I can't really raid test in my head, so yeah some of them might be slighty unbalanced or flat out boring.
Btw this is what the story looks without the massive detailed encounter design.
Deep Water Horizon!
Story:
News of a deep underground army forming that are threatening to destroy the world as we know has reached the leaders of your faction, as an experienced adventurer the leaders has requested that you and your co-adventures travel deep down into the ground and seek out and destroy the leaders of these dangerous creatures.
The journey begins with you travelling to see Baron Revilgaz in Boot Bay, who shall assist you in your journey deep into the abyss. He is standing by at an already prepped Zeppelin. As soon as you're ready you talk to Baron Revilgaz and the flight starts, as the zeppelin starts to move and you become fully airborne you enter the instance. And this is where the real experience starts. As you're flying out towards The Maelstrom the zeppelin encounters a mechanical failure and you're forced to abandon the shuttle. Baron Revilgaz's assistant "Hansi Gazprom" starts handing out parachutes to make sure everyone can get off the zeppelin, as the zeppelin drops altitude you see an island not far from your current position, and the zeppelin is heading towards it. As time goes the zeppelins gasoline driven engine explodes and sets fire to the zeppelin, making it drop into the sea. As you land on the water you're forced to swim towards the island or die of fatigue. As you approach this small island in the middle of nowhere you realize that the island is inhabitanted by foul creations that fit the description you've been told. You're now all standing on the beach head surrounded by foul creations, as the zeppelin blows up a final time the foul creations go into hostile mode and attack you if you're on the beach, as you kill these off Hansi Gazprom suggests that you seek refuge in the woods and you start exploring the island. As you walk through the woods you see a giant mine ahead. You decide to enter it on request from Hansi Gazprom, and see what they could have been mining here. As you progress through the mine it collapses and your entire raid falls down into a river with a heavy stream, and you get dragged further down into the ground. As you're swimming downstream you encounter the first raid boss, Rotgrip.
After Rotgrip dies he falls off the edge of a giant waterfall and hits the ground beneath. Hansi Gazprom saved his parachute and managed to use it to survive the massive fall, so he resses you all with his mass res ability and you find a chest with some loot nearby.
After you're done with looting Rotgrip you talk to Hansi Gazprom and the adventure continues. Talking to Hansi Gazprom starts a trigger and you see that Rotgrips corpse is plopping the hole that the water is suppose to flow into, so the water is now rising on the ground you're standing on. Hansi Gazprom points to a tunnel and you start running through it while killing some trash mobs that resemble the trash you meet in Stone Core only much harder, after running for a bit you find a big opening with giant diamonds hanging from the roof. As you move into the opening, you trigger the 2nd boss fight, Corbolt.
After you've reduced Corbolt's health to zero. Hanzi Gazprom will appear from his hiding (he managed to sneak away). Once you talk to Hansi Gazprom you will force another trigger and you will slowly start to see the water coming from the tunnel you came from. Hansi Gazprom looks down into one of the holes in the ground that Corbolt has formed and sees that the fire has gone out due to the water flowing down into the holes and exquisiting it, so he suggests you jump into it and see where they lead as you have nowhere else to go from the looks of it.
As you reach the bottom you can see the massive tunnels that Corbolt has formed, as you begin to run you see the water rising behind you. Hansi Gazprom suggests you run towards the end where the tunnel goes upward, so you do that. As you're running through the tunnel Hansi Gazprom starts talking about it getting very hot all of suddenly and you start to see red glowing light at the end of the tunnel, as you reach the end of the Tunnel you see a massive lava pool with some narrow paths leading to the 3rd boss, Baron Geddon.
After he dies Hansi Gazprom comes running and you talk to him to trigger the next part of the adventure. Once you talk to Hansi Gazprom you will see the water flowing from the tunnel going into the lava and creating huge stream clouds. These water vapor clouds go up under the roof, and some rocks begin to fall down around you. Suddenly an earthquake hits and you see the rocks are moving around and suddenly they form the 4th boss in the instance, Garr.
Once Garr is defeated Hansi Gazprom instructs you to give him the pieces for the Talisman of Elemental Bindings (like a quest). He then combines the two parts and says some words in a language you don't know, and a portal opens up.
Upon entering the portal you find yourself on a large floating piece of rock high in the skies (think Avatar(the movie) landscape). Here you encounter harpy trash mobs that you kill as you go on, the initial rock is the highest floating rock and you will have to use levitate/slowfall to get to the other rocks. Upon reaching the last rock, which is empty you can hear loud wing flaps from underneath. A large Harpy comes flying up to you and this is the 5th boss, Aviana, The Lady Raven.
Upon killing the Aviana you hear Hansi Gazprom cheering, when you talk to him you trigger the next part of the event.
This is where things get really interesting. A floating ship approaching on the horizon. Muradin Bronzebeard is aboard (alliance side, not sure what the horde counterpart is). He yells to you not to trust Hansi Gazprom, he is in reality Lord Victor Nefarius and is trying to lure you into releasing Neputalon from the ocean depths through the Talisman of Elemental Bindings, it has all be one big hoax created by Lord Victor Nefarius. You look at Hansi Gazprom and then he reveals his true self and that he is Lord Victor Nefarius. He thanks you for getting rid of Aviana, the protector of the Seal of Water. Muradin Bronzebeard yells for to come aboard and man the cannons on his boat before Nefarian has time to release Neputalon.
The heroic only part makes Neferian try to escape only to hit the boat and die, but it disables its flying abilities and it crashes into the last piece of rock, and you all fall helplessly towards the ocean, doing the fall you see the ocean turn into a massive maelstrom, which you get sucked into, at the bottom of the Maelstrom you face off with Neptulon the final boss.
After Neputalon dies a massive wall of water shoots up into the air and the ocean floor is cleaned of water, you hop into the sunk flying boat and water returns and Muradin Bronzebeard gives you a chest for your success, as the boat slowly leaves the ocean floor.Last edited by mmocff76f9a79b; 2012-07-22 at 04:34 PM.
-
2012-07-22, 04:26 PM #16The Lightbringer
- Join Date
- Apr 2009
- Location
- Cork, Ireland
- Posts
- 3,041
Well if you feel creative again, hand in another Originally Posted by Yilar
But remember you cannot submit for 24 hours after the other idea is finished.
-
2012-07-22, 05:19 PM #17The Insane
- Join Date
- Nov 2010
- Posts
- 15,804
Highest Position: 2nd on the 23rd July. Remained on leaderboard: 6 days.
Every boss in my raid must exist already? That makes things kinda worse, for I'll have to pick on quite some extra lore. But I'll try:
The Raid Name: Tor'Watha
Location: Eversong Woods
Area/Lore/Objective Text: Ever since the jungle trolls on Zul'Aman were defeated twice, the remaining forest trolls of the other northern half of their continent of Zul'Aman were beginning to lose hope. However, as time goes by, the spirit of the serpent goddess Ula-Tek shows upon their people. Ula-Tek was formely known as a mere legend, but she has seent hat it is finally the time for the forest trolls to rise up and take controll of Quel'Thalas once and for all.
If things weren't bad enough, the Revantusk Tribe that were formely allied with the Horde joined them. Since the Revantusk found out that the Horde was responsible for Zul'Jins death, and they didn't like Garrosh being the warchief. Vol'Jin tried to reason with the Revantusk leader, but they were confident that they'd rather die fighting for their homeland than joining the ones who killed their beloved leaders.
The Zandalari will not play any part in this raid
Raid layout: The raid will consist of 6 bosses, with a VERY SPECIAL unique 7th boss thats only summonable by a large amount of quests. The layout will be similiar like Zul'aman and Firelands, where you can choose which of the first 4 bosses you want to kill first. After those 4 bosses are dead, the 5th one will be unlocked. After the 5th's death, the 6th and final boss will be unlocked.
The raid itself is a very large forest, with a beautifull view over the entire raid. At the very end of the raid you'll see a large temple, known as the Shrine of Ula-Tek. That is where you'll fight the final boss. There will be no timed event like in Zul'Aman, but there are other very small and fun events during the raid itself.
Boss 1: Zen'Kiki - you may know this clumsy troll from the Plaguelands. Despite that he may look like a total goofy, he was actually an extremely powerful troll all along who only pretended to be that bad. He infiltraded the Argent Crusade, and sabotaged them enough so that they will not be able to reach Tor'Watha.
Boss 2: Rin'Ji - you may know this troll from the Hinterlands, where he used to be a prisoner in Quel'Danil Lodge. Now finally being freed by the Horde, he joined Ula-Thek's jungle troll tribe to take revenge for every single forest troll that died in the Hinterlands.
Boss 3: Elder & Primal Torntusk - these 2 trolls are the leaders of the Revantusk tribe, who joined Ula-Thek in Tor'Watha. Being formely loyal to the Horde, they can't stand to stay within the Horde any longer because of their new and corrupted warchief Garrosh. They despised the Horde aswell after having heard that theyw ere responsible for Zul'Jin's death
Boss 4: Grand Magister Rommath - despite being a blood elf, Ula-Thek accepted him and his followers into Tor'Watha after hearing how much they despised the current blood elves. Rommath revealed that he wishes Kael'Thas never died, and that he would've been the lord of Quel'Thalas instead of Lor'Themar. Rommath was always a very loyal follower to Kael'Thas, and by joining Ula-Theks tribe, he hopes to whipe him and his followers out of the way to gasin controll of Silvermoon.
Boss 5: Ral'Jin - Ral'jin is a forest troll witch doctor. He is trying to gather enough sacrifices to summon Ula-Tek (copied from WoWpedia). He will be the one who will manage to summon Ula-Thek into the world, and he will succeed before getting killed by the adventurers.
Boss 6: Ula-Thek - Ula-Tek is a goddess serpent who is widely worshipped among the forest trolls in Zul'Aman (copied from WoWpedia). She will be fought above her own shrine, the Shrine of Ula-Thek. After the fight, it is revealed that there's actually a much darker and sinister plan behind her...
Heroic only Unlocked Boss: Spirit of Hakkar - After completing a very long and hard questchain when you killed Ula-Thek, a badass laser animation will come out of the Shrine of Ula-Thek, targeting the sky. The sky will suddenly turn dark/purplish, and you will hear The Spirit of Hakkar yelling. After that you get sucked into another dimension, where you face off the Spirit of Hakkar himself.
Boss quotes
Some quotes I made up for the bosses:
Zen'Kiki: Look who's here... the very same people who laughed at my back for my so called ''clumsyness''. A pity you will bring your own shame down within your grave, which I will be burying here, right before my eyes. I am Zen'Kiki, I am.... AN ARCH DRUID!!!
Pull: Lets see who needs more training!
Kill 1: Not bad for such a clumsy troll, right?
Kill 2: This was for all the laughing!
Special druid kill 1: Who needs to learn their class NOW???
Special druid kill 2: Allow me to set up my troll face while you die!
Death: Perhaps I was better off.... working with the Argent Crusade....
Rin'Ji: (to Alliance) Ah, look who has arrived, this ''Alliance'' who kept me captive. Your people are nothing but racists, spineless cowards, only ready to attack me when I'm unarmed. Yes, I lost my axe a long time ago (see http://www.wowpedia.org/Axe_of_Rin%27ji), and yet you people were ''brave'' enough to bring the fight to me.
Rin'Ji: (to Horde) Perhaps I should thank you for free'ing me in the Hinterlands, lets just say my ''thank'' was to let you live. You Horde may have saved me, but you happen to be allied with those blasted blood elves. How I hate them... they killed my entire family, the brutes. Cowards, sicklings. Hahahaha..... I will enjoy cutting the limbs of all blood elves right in front of your eyes.
Pull: None will stop us from our glorious future!
Kill 1: I didn't even need my axe for this!
Kill 2: This was for all my brothers you've killed!
Special blood elf kill: BWAHAHAHAHA! YOU DESERVED THIS FATE!
Special blood elf kill 2: DIE! DIE! DIE! DIE! DIE! AND DIE!!!!!!!!!
Death: Death is unavoidable... but it was a pleasure to fight alongside my people
Elder & Primal Torntusk: Our tribe once belonged to the Horde, once. We lost a great deal of respect when you killed our hero, Zul'Jin. Was he truly evil? Perhaps, but he cared for us and all the forest trolls. Now, your leader (Garrosh/Varian) seeks to continue whiping our tribe out? We are united, we are unstoppable now. And now is the time... for revenge.
Pull: Lets take them together!
Kill 1 (Elder): I've killed this worm for you, my love!
Kill 1 (Primal): The Torntusks are invincible!
Kill 2 (Elder): Eat dust, fool.
Kill 2 (Primal): It has been my pleasure.
Death (Elder): The Revantusk... will live... forever!
Death (Primal): My love... avenge me...
Grand Magister Rommath: I can feel it... the power of the fel energy that was once bestowed upon Kael'Thas himself! Lor'Themar is a fool, he could never lead the blood elves! That bastard hasn't done anything for years! <-- (joke from the playerbase that he basically does nothing). Our beloved Kael will never come back, but with the help of the Amani tribe, they will help us to overthrow him once and for all.
Pull: Silvermoon will be MINE!
Kill 1: Ha! A glorious shot!
Kill 2: BURN in the afterlife!
Death: I will join my glorious leader...
Ral'Jin: So much work... gathering enough sacrifices to summon the great one, but it'll be worth it. Look what we've here, more sacrifices? You want to put up a fight? Very well then, it'll be fun fighting actual heroes.... instead of those helpless children... (maybe should've left that out?)
Pull: Your bodies look perfect, to be sacrificed to our great leader!
Kill 1: Yes... YES! Your body will be used for a greater purpose!
Kill 2: Ind eath you are worth more than alive!
Special blood elf kill: DIE! DIE DIE DIE, CURSED ELF!
Special blood elf kill 2: YOUR PEOPLE DESERVED IT! I HATE BLOOD ELVES!!
Death: Oh great Ula-Thek... take me, please...
Ula-Thek: I have been summoned, at last! The age of the Amani has come, our tribe shall take back this world as it originally was! You were fools to come all the way to my very Shrine, now this place will be your own grave.
Pull: The culling in Azeroth can wait, your deaths will come first!
Kill 1: You should've never have come here!
Kill 2: A pity you won't witness how we destroy your precious capital
Death: NNNNNOOOOOO!!!!! Our Dark God.... watches over us....... and you...
Spirit of Hakkar: MUUUHAHAHAHAHAHAAAAA!! DEATH, IS ALL I SEE FOR YOU WORMS. THANK YOU MORTAL, SUMMONING ME ONCE AGAIN INTO THE WORLD, JUST AS IN ZUL'GURUB. I MAY NOT BE MORTAL YET, BUT IT WILL ONLY BE A MATTER OF TIME AFTER SUCKING OUT THE VERY LIFE OF YOU AND ALL YOUR FRIENDS. YES, (name) BROUGHT YOU TO YOUR OWN DEATH... NOW ENTER, MY OWN REALM!
Pull: ALL LIFE IS MINE TO TAKE!
Kill 1: (cackles maniacaly), YOUR LIFE ENDED, FOR GOOD
Kill 2: YOU WILL ONLY SEE DARKNESS IN THIS REALM
Death: NO! THIS SHOULD'VE BEEN MY HOUR TO VICTORY... MY MANIPULATIONS WITH THE GURUBASHI... AND WITH THE AMANI... ALL FOR NOTHING!!!!!!!!!!!!!!!!!!!!!!!!!!!!!
Events
Event 1: At some point during the raid, you will come across several hang bridges. When you kill the scout who's standing before the gauntlet, some huge waves of trolls will run towards the raid. These mobs are quite tough and won't drop any loot. Now the raid has 2 options: They can stay and kill off all the troll waves, or they can run across all hang bridges, and actually untie the hang bridges so the charging trolls will either fall to their doom, and can't chase you anymore.
Event 2: After you kill Ral'Jin, Vol'Jin will enter the area and free the remaining prisoners. One of these prisoners is a troll child, who witnessed her parents getting killed by the adventurers. Ral'Jin wanted to sacrifice her aswell, since her parents were no longer around to protect her. Vol'jin will explain to her to not lose hope, and at that moment Vol'Jin will pick up the crying troll child and hold her in his arms. At that point Vol'Jin will walk with her back to the entrance, where he promises he will take care of the child himself. (one more emotional event for WoW)
Event 3: After someone finished the quest chain in order to summon the Spirit of Hakkar, Vol'jin and either Thrall of Jaina (depending on faction) will walk upon a huge altar, where a large beam is striking towards the sky.
Thrall: I sense a tremendous amount of darkness in this place... such power... what is happening?
Jaina: What is happening here? What is that large ray towards the skY?
Vol'Jin: Oh no..... this ain't good...
A very large image of Hakkar is coming down the clouds, sticking his head out.
Spirit of Hakkar: VOL'JIN! YOU HAVE BEEN A PAIN IN THE EYE FOR EVERY TROLL TRIBE IN EXISTANCE! YOU BETRAYED YOUR KIND, BY JOINING THOSE FOUL HORDE SCUM. NOW, WITNESS, AS ONE OF YOUR ALLIES WAS KIND ENOUGH TO GRANT ME A SECOND CHANCE... A CHANGE TO RECREATE THIS WORLD, FOR ME TO RULE.
Thrall: <name>! How could you do this? You doomed us all!
Jaina: Is it true... <name>? Have you summoned this fiend back into our world? How could you?!
Vol'Jin: Please, keep your head together. Whats done is done. In fact, it is not the adventurers fault... it is mine.
Thrall and Jaina: WHAT?!
Spirit of Hakkar: SPARE YOUR PITY IN YOUR DEATHS, FOR I WILL SPIT ON YOUR SOULS ONCE I STOLE THEM! I PROMISED TO MYSELF, TO TAKE REVENGE ON THE HEROES WHO KILLED ME IN ZUL'GURUB... AND NOW... I SHALL...
*Hakkar drains al the players into his realm*
Spirit of Hakkar: YOUR HEROES ARE DONE FOR, LITTLE TROLL!
Vol'Jin: I made a promise to my people... I wanted them to keep them out of danger, to live in peace with our allies. We have gone trough so much... and we are not just gonna let it be for nothing.
Vol'Jin: We.... ARE THE DARKSPEAR TRIBE! OUR WILLS OUR STRONGER THEN YOU THINK, HAKKAR! YOU WILL NEVER BRING US DOWN! CHAMPIONS, STAY STRONG... DEFEAT THIS SPINELESS GOD ONCE AND FOR ALL!!!
Pictures
Shrine of Ula-Thek

An old map of the raid setting

Spirit of Hakkar abilities and phases
Phase 1: Welcome in my realm
The raid will be in a place where the grounds are dark, and the sky is purple. Huge amount of wind will be visible, there'll also be thunder, like during a storm on sea. The Spirit of Hakkar will be standing there, waiting for you.
Curse of the ancients: Hakkar will curse 3 players (7 in 25-man) with Curse of the Ancients. This curse will reduce your attack and casting speed by 40%, damage and healing done by 30%, and movement speed by 30%. It must be dispelled 3 times to fully remove it.
Hakkars Will: Hakar will mind controll 2 players (3 in 25-man) for 15 seconds. It is unresistable and you can not save them.
Fisure: Hakkar will put a light-glowing small circle on the ground, where players are standing. After 6 seconds, the circle will dissapear and any player standing on it will instantly die. See Kel'Thuzads fissure.
Hakkar can also summon 2 adds: Gurubashi Soul Keeper and Amani Soul Drainer.
Gurubashi Soul Keeper: They will be using a ''Soul Drain'' like ability against players. If his mana eventually becomes full, then he allows the Amani Soul Drainer to take it. You will see why.
Amani Soul Drainer: He will keep melee'ing the raid. If the Soul Keeper has full mana, the Soul Drainer will take it all and eventually blast a great amount of damage on the entire raid. It is up to the raid to kill one of them as soon as possible, to prevent this to happen.
Phase 2: The realm drowns
At 60%, Hakkar and the raid will now be ''flying'', casters can now cast while flying. Here Hakkar gains the following abilities:
Breath of torture: Hakkar will spew purple fire to any location, and will fire it at various locations. The raid must avoid them.
Hakkar's thirst: Hakkar will target a raid member, and will try to devour him. The targeted raid member must kite him, if Hakkar catches him he'll instantly die.
Hakkar's Stare: Hakkar will evily stare at some raid members, reducing their stats by 25% for 25 seconds.
Hakkar's Hearth: The hearth of Hakkar will pop out after an X amount of time passed. Hakkar will feel incredible pain, and his hearth will lie exposed for the raid to attack. If the raid manages to kill the hearth, phase 2 will be over. If not, Hakkar's health will be decreased judging by the amount of damage the hearth got. There's no hard mdoe or anything.
Phase 3: Back to our realm
At 30% health, Vol'Jin and Thrall/Jaina will have managed to fully bring Hakkar to their world. It is here where they can end him once and for all.
Vol'Jins Will: Hakkar will manage to enslave Vol'Jin, now fighting for him.
Dark shards: Hakkar will spew out some dark shards to the grounds, players near it will receive some damage.
Poisonous claws: Hakkar will give the tank a debuff, where he gains 100% extra damage taken from nature damage. Hakkars nature damage done will be increased by 50%. This is where the tanks need to swap.
Vol'Jins abilities:
Hex: Vol'Jin will hex 2 players (4 in 25-man) into frogs, for 15 seconds.
Shadow Ward: A snake ward like the ones in WC3, that'll deal ranged damage to raid members. The ward will gain extra damage over time, so the raid must kill it quick.
Shadow prison: Vol'Jin will imprison Thrall/Jaina, so they will be unable to help.
Big Bad Voodoo: If Vol'Jin reaches 10%, he will make himself invulnerable, but he can no longer attack or move.
After Hakkar is defeated, his hearth will lie exposed once again, and this time the hearth can no longer retreat. A freed Vol'Jin and Thrall/Jaina will help the raid to attack the hearth, ending Hakkars life once and for all.
Soccer mini game
In a small area inside Tor'Watha, there's a soccerfield where the off-duty trolls are having some fun playing the sport. They will be neutral, and can not be attacked. You are even able to talk to them, but at first they won't be that friendly.
As a raid, you can actually challenge the troll soccerteam for a match. If you win the fight, then you are rewarded with cool and shiny stuff (tabards, pets, mounts, funny usable items etc). If you lose the fight, than nothing basically happens, but all the trolls will be laughing you out :P. If you lose, you can challenge them again. If you win, you can challenge them aswell, but there will be no more rewards.
If you look at it, its similiar to the Chess Event in Karazhan. Except that instead of being a boss, its a minigame with some fun rewards.
Abilties
When your raid accept to have a soccermatch against the trolls, you will lose all your abilties, but gain some new one:
Kick: Using this ability will kick the ball when your near it. It is usuable if a troll has the ball, so you can steal it from him.
Slide: You are able to slide in front of a troll. If the troll has the ball, then you will grab it as your sliding.
Catch: Using this ability will let your character try to grab the ball by their feet if its near him. You will have the ball unless a troll steals it.
Speed: You now walk 50% faster for 5 seconds
How to win
In order to win, you either need to be the first to score 5 points, or be the team that has the most points after 10 minutes expire. Every soccer match will last 10 minutes.
Team layout & penalties
In a 10 man raid, 8 players can be on the field. The other 2 are reserves. In a 25 man raid, 11 players can be on the field. You can have 4 reserves, the rest are spectators. Maybe its better for a 10 man raid to reduce the amount of players on the field by 5, having 2 reserves and the rest are spectators. I don't know which is better yet.
It is possible to accidently injure each other. If you injure a troll player by sliding too close that he trips over, the troll team gets a penalty. This happens rarely, due to gameplay reasons. It is also possible to accidently kick a troll in their leg, giving them a penalty aswell. The same goes for when trolls accidently injure your raid, then you will get a penalty.
Mob quotes
Troll soccer player: Don't look so dumb at us, ya fool. This is our national sport, one of the most athletic sports ya'll ever see. We trolls are known to be undefeatable, you won't have a single change against us.
Troll spectator: Look, we are on a break, so we don't feel like attacking you right now. But watch yourselves, try anything and we will use your head for our next soccermatch.
Troll spectator: This sport looks like fun! Some day I wish that I'll be on the field aswell!
Troll spectator: Look at dat player over there! He can hold the ball in the sky for like, 10 minutes!
Troll soccer player: Puh! I can hold that ball twice as longer than you did!
Troll soccer player 2: Oh really? Than show it! *kicks the ball to him*
During a soccermatch
Troll player: These outsiders challenger us! Let's show them who's best!!
Troll kicks the ball: Hey you! catch!
Troll slides: NOT SO FAST!
Troll catches a ball: I got it! stay on front!
The raid scores a point: That was nothing! We'll win anyway!
The raid scores a point 2: The next score will be ours!
The troll scores a point: A glorious score! Did you see that?!
The troll scores a point 2: I'm the best soccerplayer ever!!!
The raid wins the soccermatch: You outsiders are much better than we thought... oh well, it was a great match! Here are your rewards, if you ever want to play again, we will be ready/
The troll wins the soccermatch: We told you, we still stay undefeated! Don't feel so bad, atleast you were better than the Dalaran Destroyers. If you wish to challenge us again, we'll be ready.
Edited: more boss quotes, events and made a better layout
Edited 2: Soccer match mini game included, added few new kill quotes for Zen'Kiki, and the Hakkar fightLast edited by Azshira; 2012-07-28 at 05:35 PM.
-
2012-07-22, 05:31 PM #18The Lightbringer
- Join Date
- Apr 2009
- Location
- Cork, Ireland
- Posts
- 3,041
Must exist or use an NPC/Character within WoW as a game. You can make the lore up but the characters must be within WoW. Originally Posted by McNeil
Edit: Good lore and I really like the choice of characters you put in, I remember Rin'ji and remember telling myself what is his purpose... I liked how you have two separate chats for the horde and alliance. Completing a massive quest line is a nice alternative than just unlocking the boss by killing the last boss Poor Rommath, will he ever have got Silvermoon for his own  Thanks for adding in the pics, overall nice creativity.
Last edited by Azshira; 2012-07-22 at 06:42 PM.
-
2012-07-22, 07:37 PM #19Warchief
- Join Date
- Sep 2009
- Posts
- 2,102
Sooo let's give mine a try...
Forgehold Annaihilon, Outland (WIP)
The Legion Conclave is a six boss Raid that contains a secret seventh boss if the prerequisites are met, but also becomes a two-boss encounter if done on the Heroic setting. The six standard bosses are; Varedis <The Legion's Edge>, Kael'Thas Sunstrider <The Legion's Force>, Negatron <The Legion's Might>, The Nathrezim Syndicate, Garrosh Hellscream <The Legion's Rage>, and finally Xavius <The Legion's Grasp>. The seventh secret boss is Talgath <The Legion's Shadow>. The second boss of this HC encounter is... Ah, read on if you'd like to find out!With the forces of Deathwing and the Shadow Council brought down the Heroes of Azeroth are required to join forces to face off against the Burning Legion. Sargeras' remaining general, Kil'Jaeden, has set up an outpost upon the broken world of Draenor / Outland, using this location to easily infiltrate the world of Azeroth through the use of the Dark Portal. As the fires of hell approach the fragile world with such haste, Adventurers of the Horde and Alliance must gather and venture fourth to the Legion Conclave within Shadowmoon Valley and put a stop to Kil'Jaeden's schemes and destroy their outpost before their numbers can invade Azeroth.
NOTE: Numbers that are split with slashes (e.g. 2/5/7) dictate that value for the raid difficulty (LFR/Normal/Heroic)
Boss 1: Varedis, The Legion's Edge

So Varedis is the first boss and thus isn't exactly... complex. Or maybe he is a little? Either way he's rather straight forward. The first thing to note is he has a very fast attack speed.Phase 1: 100% Health
- Warglaive of the Legion: With every successful strike, Varedis gain a "Legion Flame" stack. Stacks up to 100.
- Legion Flame: Varedis deals extra felfire damage for each stack of Legion Flame.
- Fel Nova: When Legion Flame gains 100 stacks Varedis unleashes a raid-wide nova of Felfire that deals 30%/50%/70% of players' max health felfire damage. Removes all stacks of Legion Flame.
- Bane of Azeroth: Varedis fixates his strength of 1/2/3 different races of Azeroth, dealing 100% extra damage with all attacks to players of that race. Casts 10 seconds after entering combat. Races are switched every 20 seconds.
- Immolation Aura: Varedis deals felfire damage to anyone who is within 5 yards of him. Lasts 10 seconds. Casts every 20 seconds after Nether Aura.
- Nether Aura: Varedis absorbs all incoming spell damage, gaining 1/2/3 stacks of Legion Flame for each spell absorbed. Lasts 10 seconds. Casts every 20 seconds after Immolation Aura.
- Evasion: Varedis has a 50% chance to dodge attacks, regardless of hit-rating. Lasts for 10 seconds. Casts every minute.
Phase 2: 60% Health
- Metamorphosis: Varedis transforms into a demon, increasing all felfire damage dealt and gaining new abilities in addition to his Stage 1 abilities.
- Chaos Eye Blast: Varedis targets a random ranged damage or healer, hitting them for shadow damage every second for 6 seconds. (Normal: --And deals the same damage to all allies within 10 yards of the target) (Heroic: --And deals the same damage to all allies in the path of Chaos Eye Blast). Casts every 20 seconds. Casts immediately after Armageddon finishes.
- Armageddon: Throwing his warglaives to two opposite towers, Varedis marks three random circles on the floor every 3/2/1 seconds, which erupt into explosions three seconds after appearing. Varedis cannot attack but can still be damaged while channeling. Lasts for 12 seconds.
Phase 3: 20% Health (HEROIC ONLY)
- True Armageddon: At 20% health Varedis continuously channels Armageddon, causing five random circles on the floor every second that explode 2 seconds after appearing. Varedis cannot attack but can still be damaged while channeling.
He has two key abilities. His first key ability is the Warglaive of the Legion tree, which enables him to empower himself and deal mass AoE damage, which stacks ramp up quickly due to his fast attack speed; roughly two to three swings every second, meaning he can get around 100 stacks every 20 seconds. His other key ability is bane of Azeroth which can deal extra damage to certain races in the group; If the chosen race is a tank then the second tank must taunt. If the tanks are the same race and that race is chosen, "you're gonna have a bad time". Varedis will never choose two different races who are the top 2 on the threat table, meaning that both tanks should never be chosen unless they are the same race.
His Auras always switch from one to another every 25 seconds. While under Immolation Aura all melee classes will be taking fire damage every second, which healers can AoE heal through, or to save mana the melee DPS can move away from the aura during the 10 second duration. If the DPS is affected by Bane of Azeroth it is suggested to move. Nether Aura means that spellcaster DPS must stop damage or else they risk him stacking Legion Flame too quickly. DoTs will drop off as soon as he casts, but DoTs cast afterwards will stay, to which each tick will be absorbed and converted into Legion Flame.
Phase 2 adds some more mechanics though nothing spectacular on LFR. His felfire damage is increased and he gains Chaos Eye Blast. On normal it is vital that ranged classes spread out away from other players, while Heroic they must spread out in such a way that there are no other players in front of them. However, with Armageddon, it makes the re-positioning much harder. Armageddon itself is fairly simple to avoid, much like Mannoroth's ability from Well of Eternity.
Phase 3 is heroic only and thus is much more of a threat. Each explosion does ~40% of a DPSer's health, meaning that three fails = you die. Healers who are careful can supply AoE healing or even single target healing, while classes that can self-heal should be fine. Range with mobile casting spells/talents should be able to survive while dealing good damage.
Boss 2: Kael'Thuzad, The Legion's Force
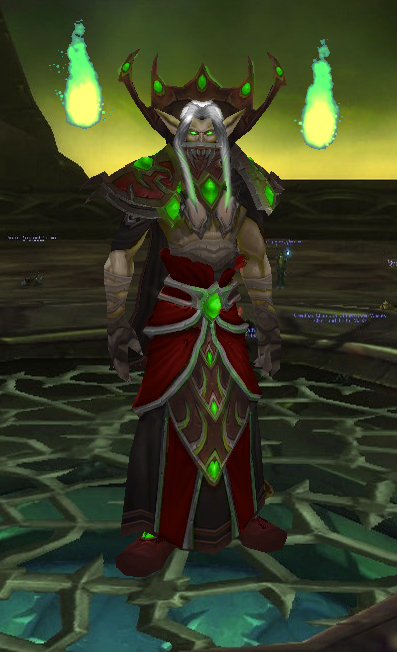
Picture done by me. Yay.
I know what you're thinking. Tempest Keep? Magister's Terrace? Naxxramas? Naxxramas AGAIN? All mere setbacks! The Legion has taken Kael'Thas' body and has merged it with Kel'Thuzad's phylactery to create this; a somewhat living, powerful, immortal mage/necromancer lich.Phase 1: 100% Health
- Pyroblast: Kael'Thuzad's main attack. Deals a large amount of fire damage to the target and inflicting them with a stack of Pyro Burn. 2 second cast time.
- Pyro Burn: Target is vulnerable to fire damage, taking 10% extra fire damage from all sources. Lasts for 10 seconds.
- Mage Orb: Kael'Thuzad summons a random orb every 25 seconds. Casts 10 seconds after entering combat. Lasts until destroyed.
- Flame Orb: Flame Orb deals raid-wide AoE fire damage every second until destroyed. With each eruption, it increases fire damage dealt to all players by 3%/5%/10%.
- Frost Orb: Frost Orb deals raid-wide AoE frost damage every second until destroyed. While active, Frost Orb reduces casting time, attack speed, channeling time, Dot/HoT ticks and movement speed by 30%/40%/50%)
- Arcane Orb: Arcane Orb deals raid-wide AoE arcane damage every second until destroyed. While active, Arcane Orb reduces spell damage dealt by 30%/60%/90% and drains all players' mana by 3%/5%/10% every second.
- Gravity Lapse: Kael'Thuzad causes a gravity lapse that flings all players into the air. Lasts for 15 seconds. Casts every 30 seconds.
- Gravity Sphere (Normal/Heroic only): Four gravity spheres follow random players while dealing arcane damage every second within 10 yards. Lasts until Gravity Lapse is cancelled.
- Vortex (Heroic Only): Every three seconds the Gravity Sphere will pull all players 15 yards from it to the center of it.
- Gravity Sphere (Normal/Heroic only): Four gravity spheres follow random players while dealing arcane damage every second within 10 yards. Lasts until Gravity Lapse is cancelled.
- Fel Sunder: While under Gravity Lapse players can activate three switches to overload Kael'Thuzad with fel energy to give him the Fel Sunder debuff, releasing his phylactery and causing him to stop casting Pyroblast while under Phylactery Vulnerability. Lasts until Gravity Lapse is cancelled.
- Phylactery Vulnerability: The phylactery randomly floats around the room, becoming targetable and sharing Kael'Thuzad's current health. Damage dealt to the phylactery is increased by 200%. Lasts until Fel Sunder is cancelled.
Phase 2: 50% Health
- Soul of Kel'Thuzad: Kel'Thuzad's soul now dominates Kael'Thas' body and gains a stack of Lich Chill every 10 seconds, as well as having newer abilities. Occurs immediately when Phase 2 starts.
- Lich Chill: Kael'Thuzad gains 5% increased frost damage per stack.
- Frost Bolt: Kael'Thuzad's main attack. Deals frost damage to targetted player and reduces movement speed and attack speed by 30%/40%/50% and inflicts Internal Freeze. 2 second cast time.
- Internal Freeze: When a player reaches 5 stacks of Internal Freeze they freeze into a block of ice, afflicted with Ice Tomb. Lasts for 6 seconds.
- Ice Tomb: Kael'Thuzad will encase 1/2/3 furthest players in a block of ice, dealing 3%/5%/7% of their maximum health in frost damage per second but reduces all other damage to 0. Lasts until destroyed. Can be inflicted upon through Internal Freeze. Casts every 30 seconds.
- Ice Barrage: Kael'Thuzad will turn to a random direction and launch multiple frost bolts in a cone, inflicting frost damage every second for 8 seconds. Targets hit are afflicted with Internal Freeze per attack. 1 second cast time.
- Frost Explosion: Kael'Thuzad casts this after every third Ice Tomb. Charges an explosion of ice that kills anyone not behind an Ice Tomb. 10/8/6 second cast time.
- Chains of Ice (Normal/Heroic Only): Kael'Thuzad pulls all players not inflicted with Ice Tomb to his location immediately after Ice Tomb and before casting Frost Explosion.
- Serve in Death (Heroic Only): Kael'Thuzad immediately raises any player killed by Frost Explosion into his servitude. A raised player has their size increased by 100%, damage increased by 200%, and healing increased by 500%.
- Lose Control: While casting Frost Explosion players can activate three switches to overload Kael'Thuzad with fel energy to give him the Lose Control, releasing his phylactery and causing him to cancel Frost Explosion, stunned, and gain Phylactery Vulnerability. Lasts for 16
- Phylactery Vulnerability: The phylactery randomly floats around the room, becoming targetable and sharing Kael'Thuzad's current health. Damage dealt to the phylactery is increased by 200%. Lasts until Lose Control is cancelled.
Phase 3: 20% Health (HEROIC ONLY)
- Frostfire Bolt: Kael'Thuzad constantly fires frostfire bolts at the main tank, each attack causing the target to recieve increased frost and fire damage by 10% per stack. 1 second cast time. Stacks last for 3 seconds.
- Phoenix Order: Kael'Thuzad begins the phase by summoning 3 Phoenix'. Each phoenix will chase a random healer or DPS target, leaving a trail of fire that stays until the Phoenix is destroyed. The pheonix will explode on contact with their target, killing them and dealing massive AoE raid damage as fire. Casts every 15 seconds.
- Mana Bomb: Kael'Thuzad deals arcane damage to 2/4/7 random mana users and arcane damage to players within 10 yards of those targets equal to 20%/30%/50% of their maximum health and draining 10% of their maximum mana. Casts every 10 seconds.
- Frostfirearcane Orb: Casts immediately after the third Mana Bomb. Kael'Thuzad creates a large orb that deals raid-wide fire, frost and arcane damage every second until destroyed. Each tick inflicts players with a stack of Pyro Burn, Frost Burn and Arcane Disruption. When destroyed it causes Phylactery Vulnerability.
- Pyro Burn: Increases fire damage taken by 10% per stack
- Frost Burn: Increases cast time, reduces movement speed and attack speed by 10% per stack
- Arcane Distortion: Reduces your maximum mana and mana regen by 10% per stack
- Phylactery Vulnerability: The phylactery randomly floats around the room, becoming targetable and sharing Kael'Thuzad's current health. Damage dealt to the phylactery is increased by 200%. Lasts for 15 seconds.
Phase 1 is considered "Kael'Thas" phase. Kael constantly fires Pyroblast at the aggroed tank, however after every 5th stack the other tank must taunt lest the main tank be overwhelmed with Pyro Burn stacks. Each orb must be DPSed down quickly, with casters focusing on Frost and Fire orbs when spawned, although melees and hunters must down Arcane orbs due to reduced magic damage. Gravity Lapse works like MgT almost to a T (acronym joke), except the orbs can pull you in on normal and heroic. While under gravity Lapse three players can "fly" to three switches on three columns to inflict Fel Sunder.
In Phase 2 it switches to the "Kel'Thuzad" phase, where he deals increased frost damage every 10 seconds, effectively making this phase a DPS race. As with phase 1, tanks must taunt off one another to avoid gaining five stacks and getting Ice Tomb'd. Ice Barrage works the same effectively, just in a channelled cone. Ice tomb's manual effect hits three random targets, but always hits one tank, and must be broken out of quickly before the damage kills them.
Frost Explosion is the most dangerous ability due to its instant kill ability unless players hide behind an ice tomb or pulls the three levels. How? Each of the furthest players must stand right next to a column with a switch and wait to be frozen. Then, three players must jump ON TOP of an Ice Tomb and pull the switch that way. This will cause Kael to Lose Control.
Phase 3 is heroic only once again. Becoming one, Kael'Thuzad becomes exactly what he is. Kael constantly spams frostfire bolt quickly on the tank and, like befor,e must be taunted occasionally. He also starts with three Phoenix' that leave a trail of fire that damages players while chasing a player. Players who are chased and caught get killed outright and large raid-wide damage is issued; these Phoenix' must be kited and range DPSed down. Phoenix' will only target one tank at a time if a tank is chosen.
At the same time Kael uses mana bombs to create his Firefrostarcane orb, which sits floating and deals large AoE damage. The orb must be DPSed down quickly before it overwhelms players and, when killed, unleashes the phylactery for a final beating. Hopefully.
(TBC...)Last edited by Guyviroth; 2012-07-24 at 01:28 AM.
-
2012-07-22, 08:58 PM #20The Insane
- Join Date
- Nov 2010
- Posts
- 15,804
I just finished the rest of my raid, I think its ready enough to participate now. I added more boss quotes, mostly pull, 2 kills and death quotes. I also added some events that happen during the raid, might wanna take a look at it :P Originally Posted by Azshira
The only thing I don't have are all the boss abilities, but that takes quite some time and space to think of them. Which is kinda a shame because Spirit of Hakkar actually has very interesting mechanics and abilities, that'll definatly blow your mind.
Thanks for liking my raid trough :P
Also notice, Rin'Ji and Ral'Jin have special kill quotes for blood elf players. I made this for their hatred towards blood elves, who are their mortal enemies. I thought it would be interesting to have such quotes towards a race you despise that much.Last edited by McNeil; 2012-07-22 at 09:02 PM.

 Reply With Quote